Restoration & Service Of A Conklin Nozac Striated Green Fountain Pen c1935 In Near-Mint Condition
Sometimes in life you’re just in the right place at the right time, when you step up, ya’ pays ya’ money and ya’ takes ya’ chances. Sometimes you’re lucky, but many times you’re not. I have a saying in life that you gotta just keep turning over rocks until you find a crawdad.
As I began to get deeper into fountain pens, especially on the restoration side, I came across an EBay auction not long ago that contained one fuzzy, out-of-focus picture much like the one shown below of 15 or twenty pens up for sale. There was much discussion in a thread over on Fountain Pen Network about this particular lot.

I took a chance on this lot of stuff for $49.00 shipped to my front door. What I found amongst the rubble (not shown in the picture above) were these: 1) a near mint Parker 51 that I will detail for you and restore in an upcoming blog post, 2) a near mint, but more importantly a true DuoVac/VacuFold in a blue striated color with the proper vacumatic clip, but with the pen body made from Duofold material, a pen which I will also restore for you in a future blog post, and 3) a near-mint green striated Conklin Nozac from the 1930’s or so that we are going to talk about today.
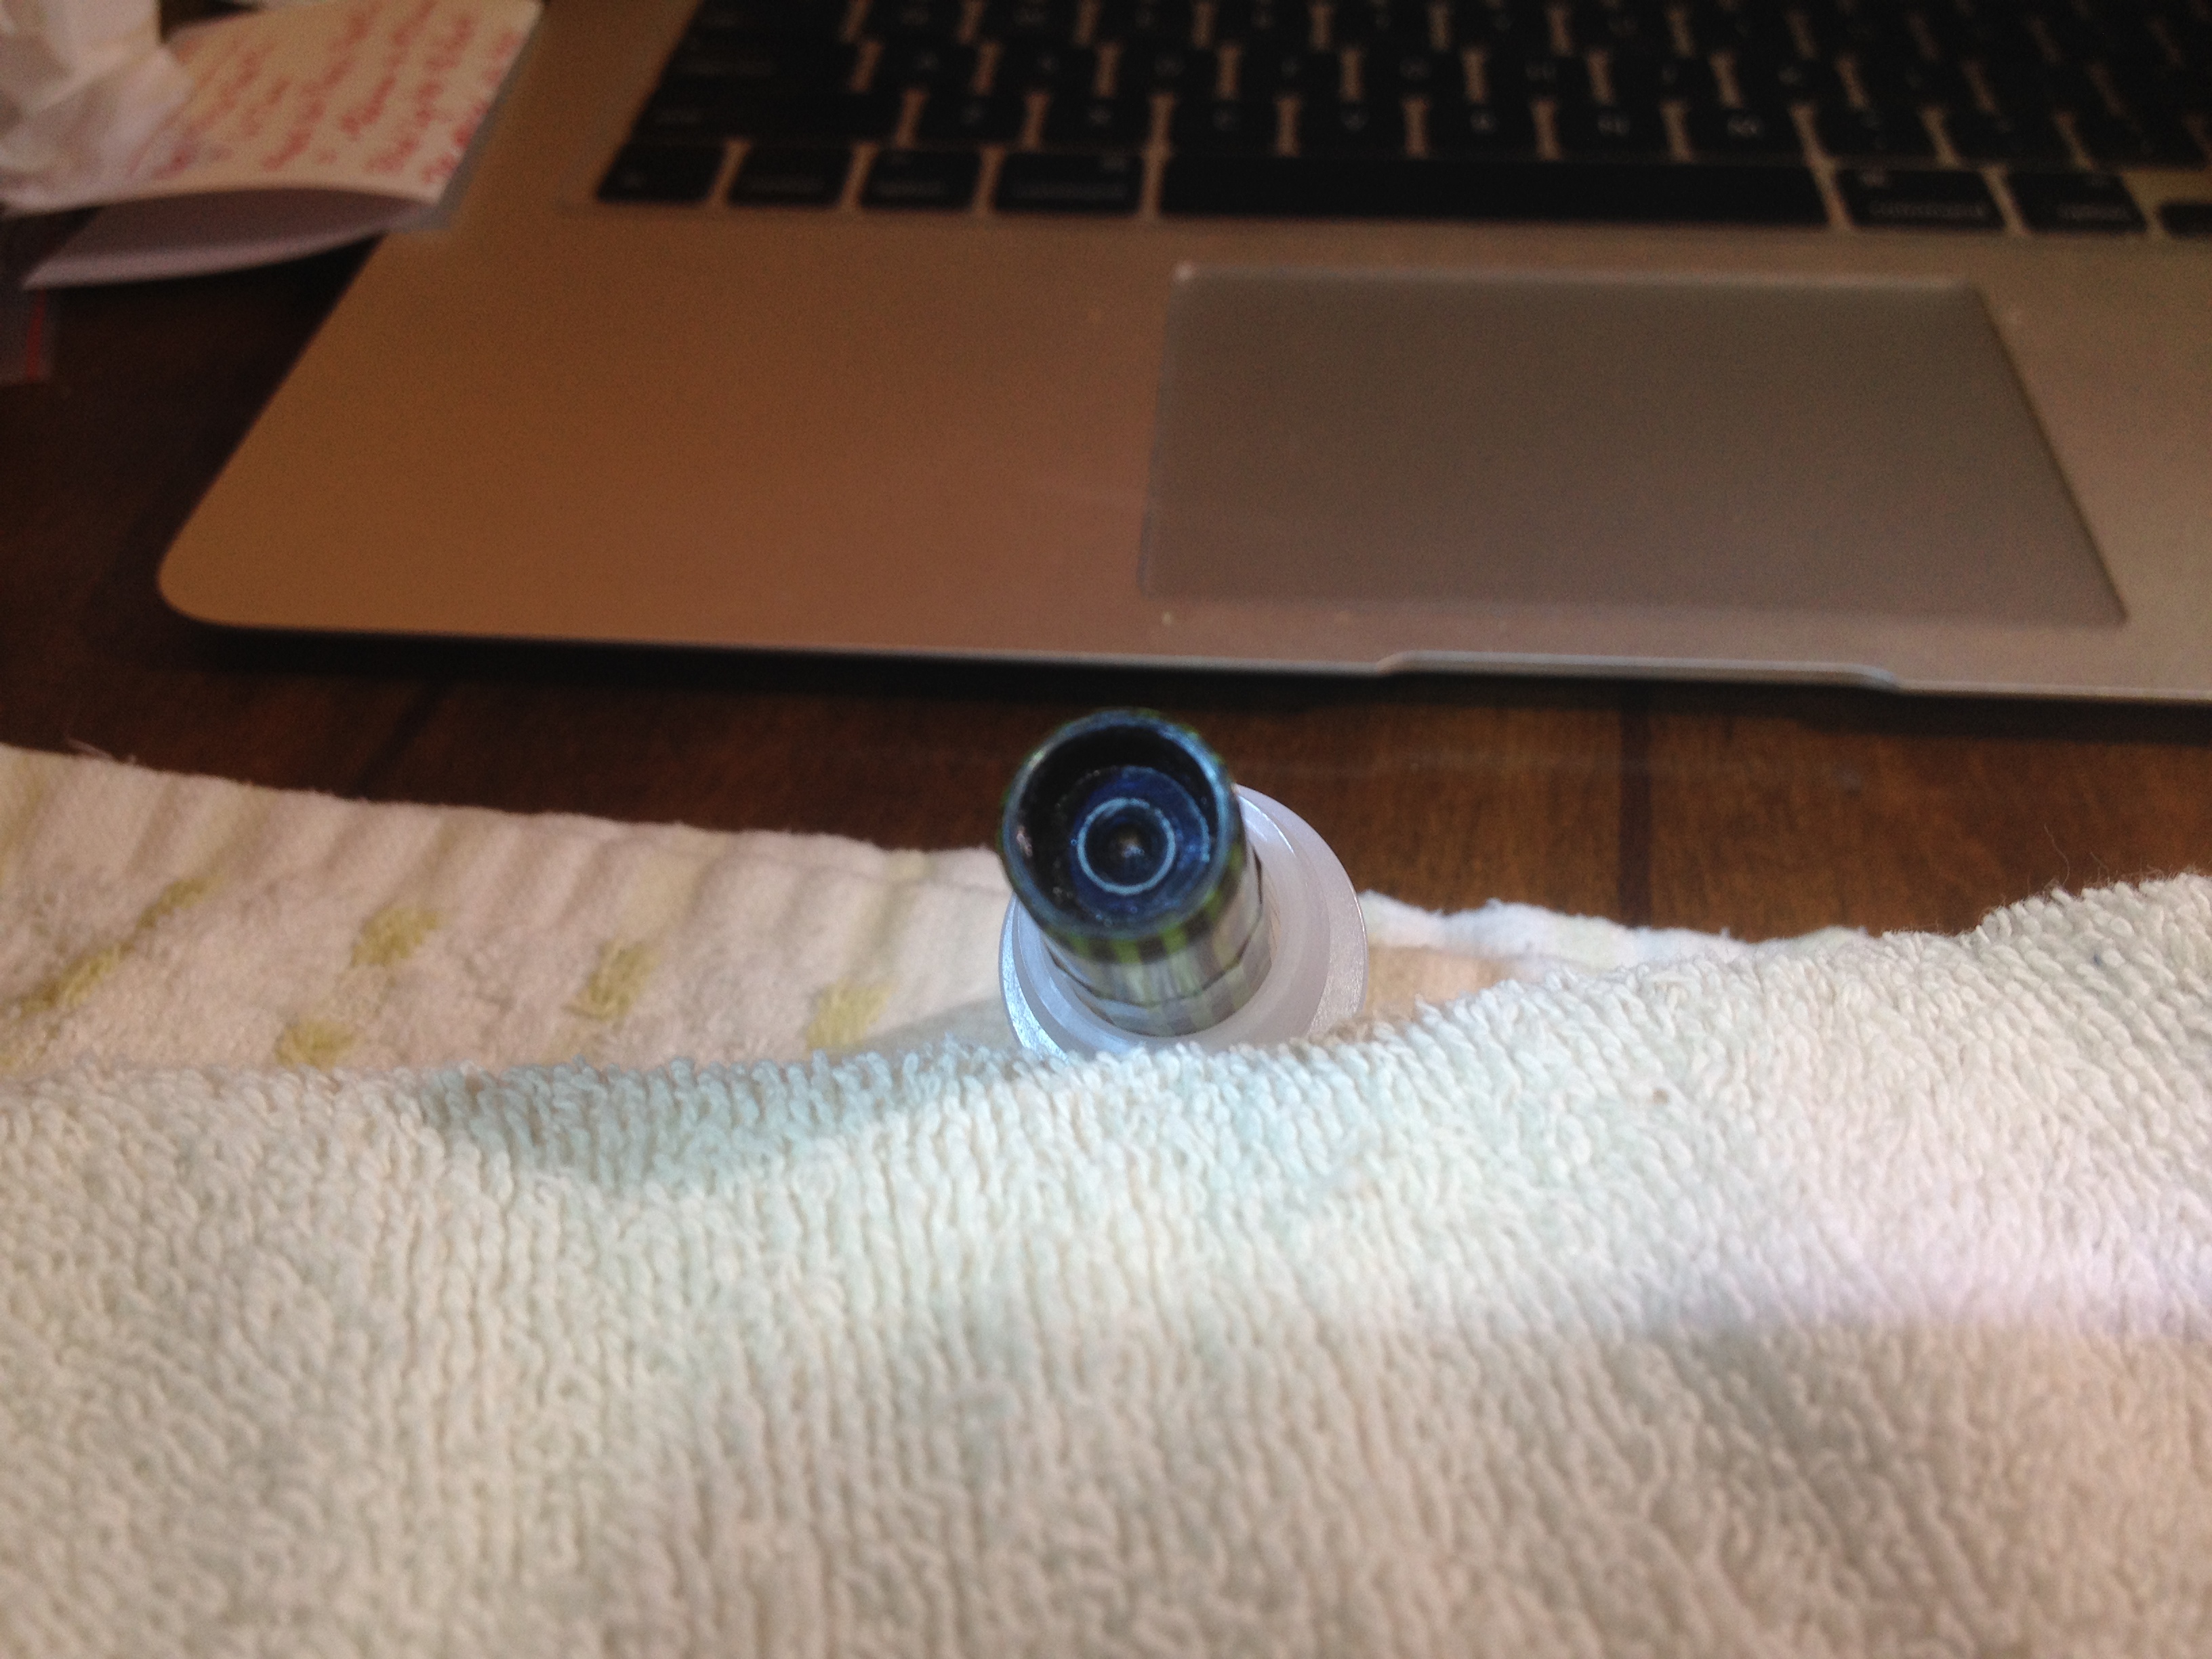
 As you can tell from the pictures it is truly a beautiful pen, but it was unlike anything I had come across before. The pen has a collapsing piston mechanism similar to what Pelikan had been using, but the blind cap was held onto the pen in such a fashion that made the disassembly and restoration a degree or two of difficulty higher than that of an Aerometric Parker 51, for example. The blind cap was held in place by a tiny pin rod that entered one side of the blind cap and ran through the center of the piston drive pin.
If the piston will move at all, the traditional restoration technique on the Conklin Nozac is to remove the section from the pen (it screws out with the help of a little dry heat) and then turn the blind cap to run the piston all the way toward the front of the barrel.
Tradition holds that at this point you’re supposed to give the internal piston a brisk counter-clockwise twist which will remove it from the inner shaft allowing you easy access to the dried cork seal without having to remove the inner shaft or blind cap. Unfortunately, this method did not work for me. I could not get the piston and old seal out.
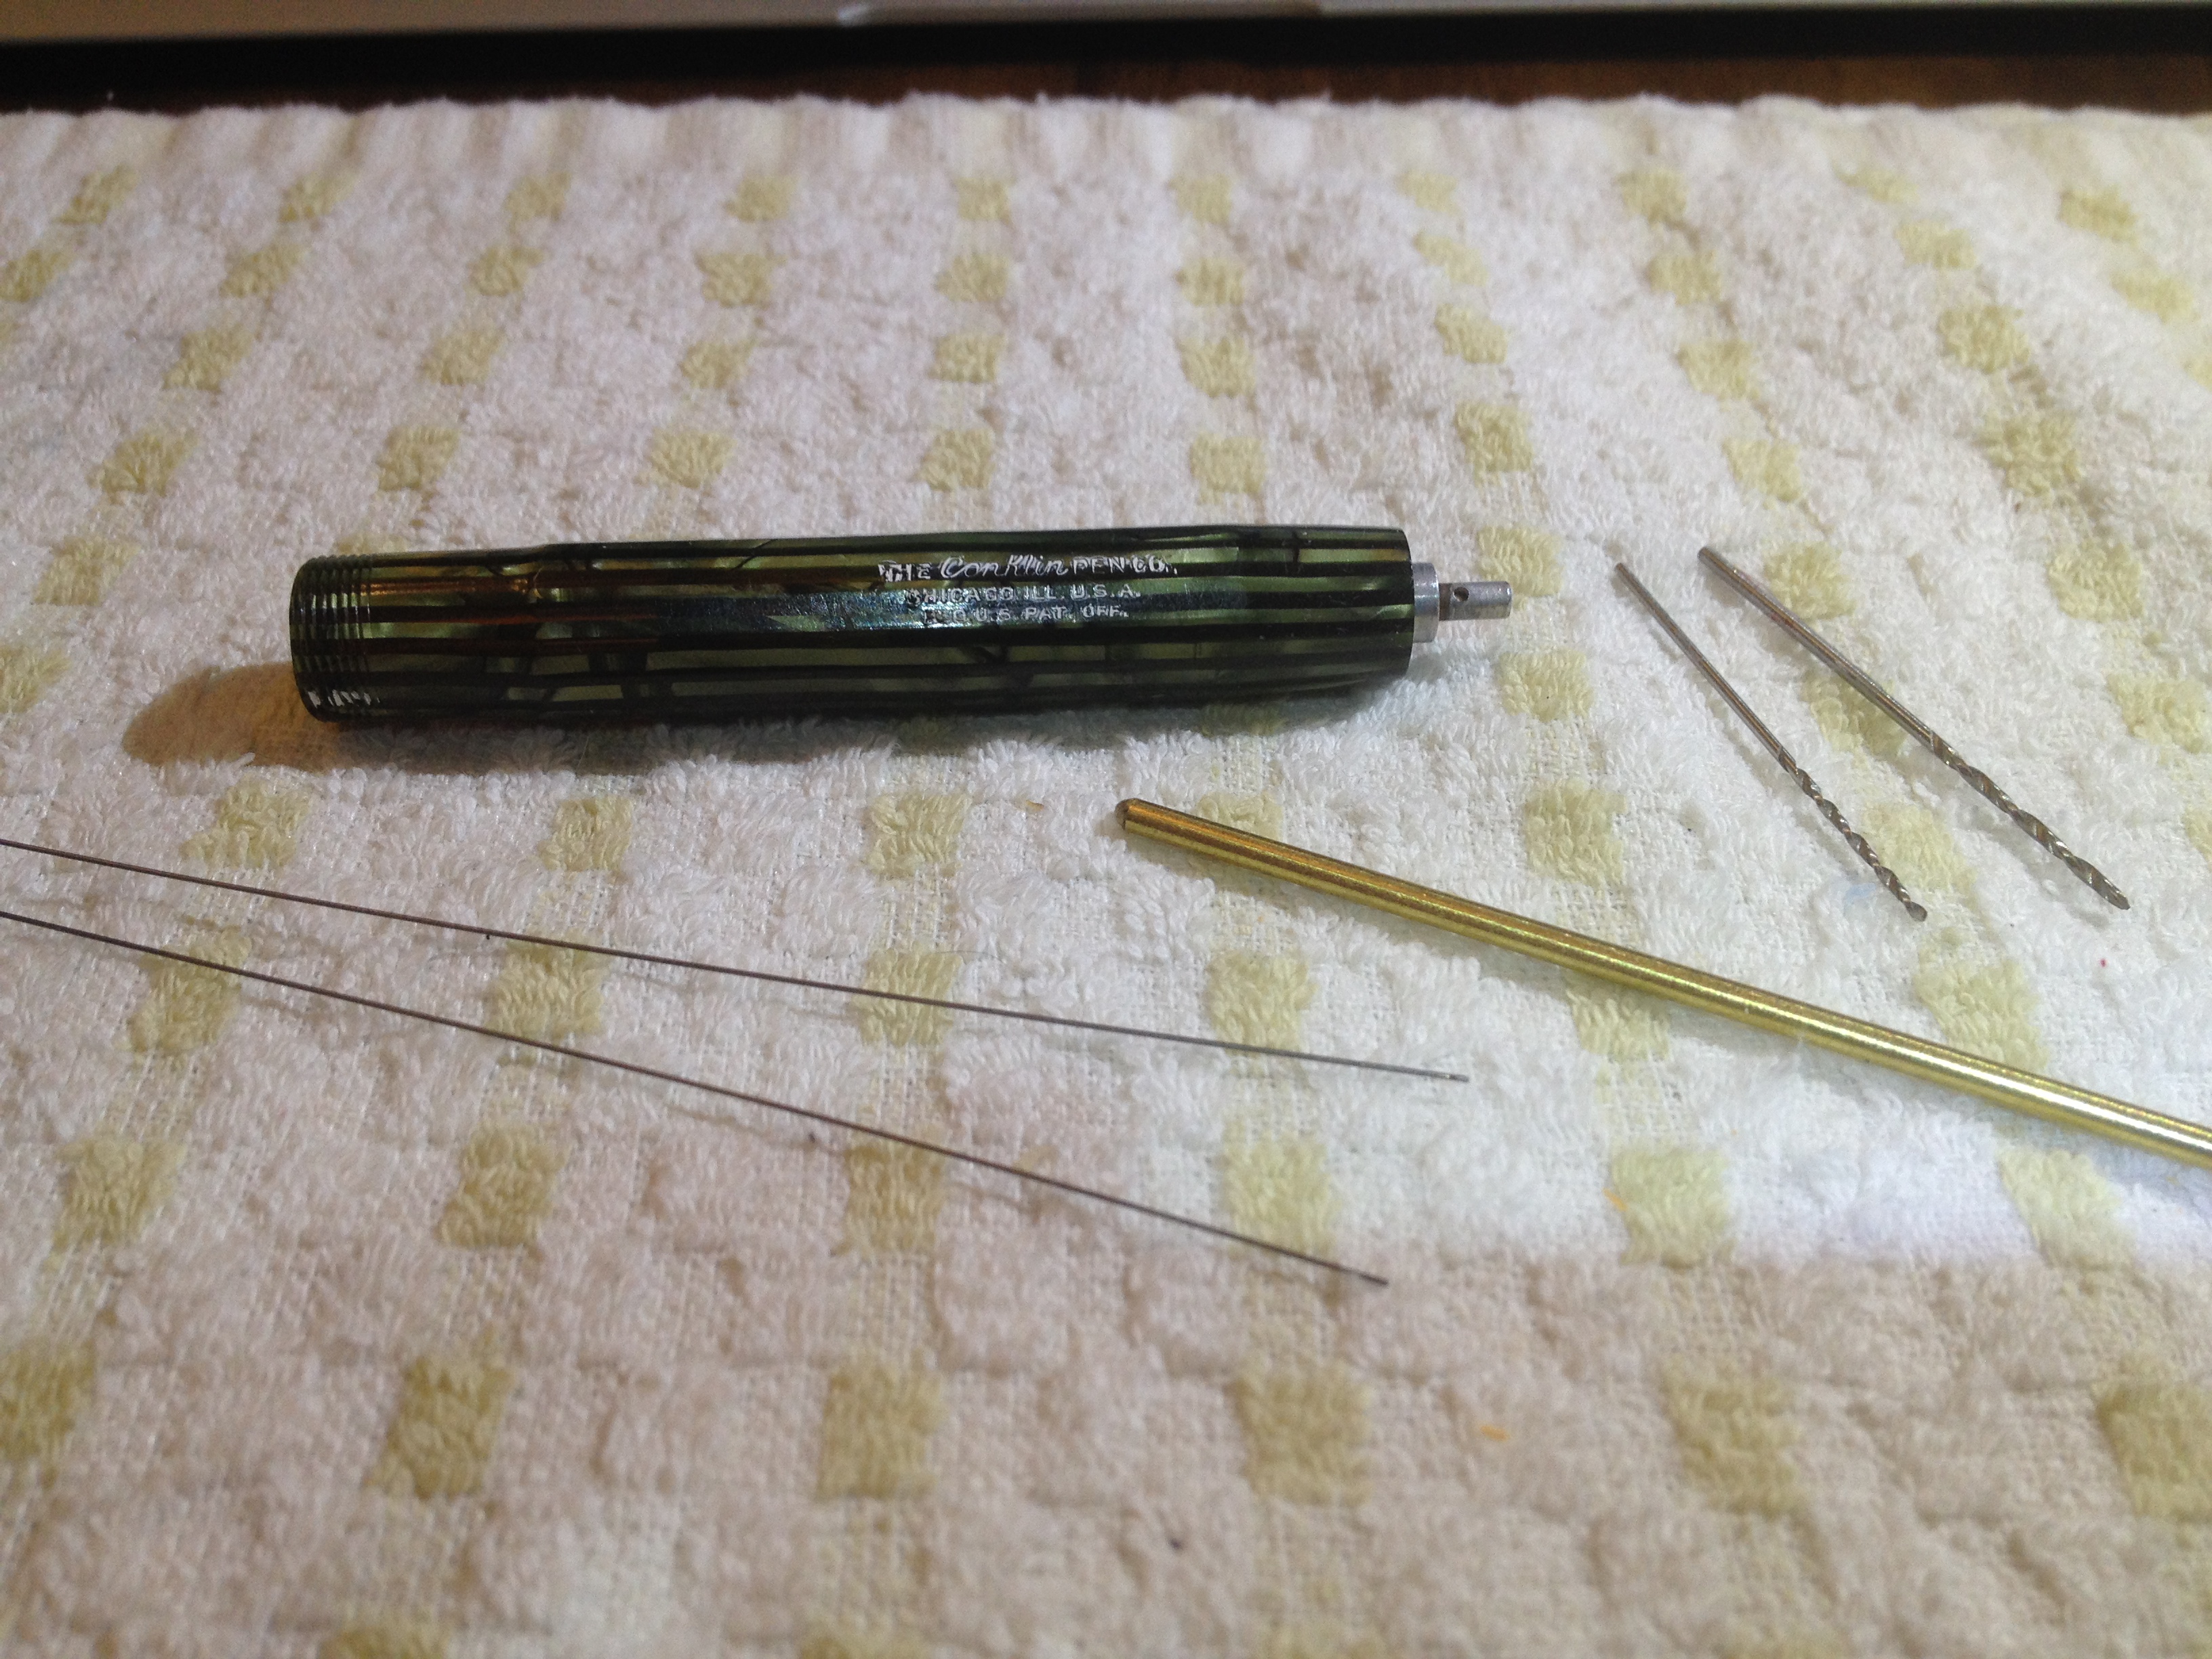
Instead I used a 1.17mm drill in a pin vice to drill a hole in the blind cap on the exact opposite side of the pin I could see. I then used the blunt end of a .97mm drill as a pin punch to remove the blind cap from the end of the barrel and piston mechanism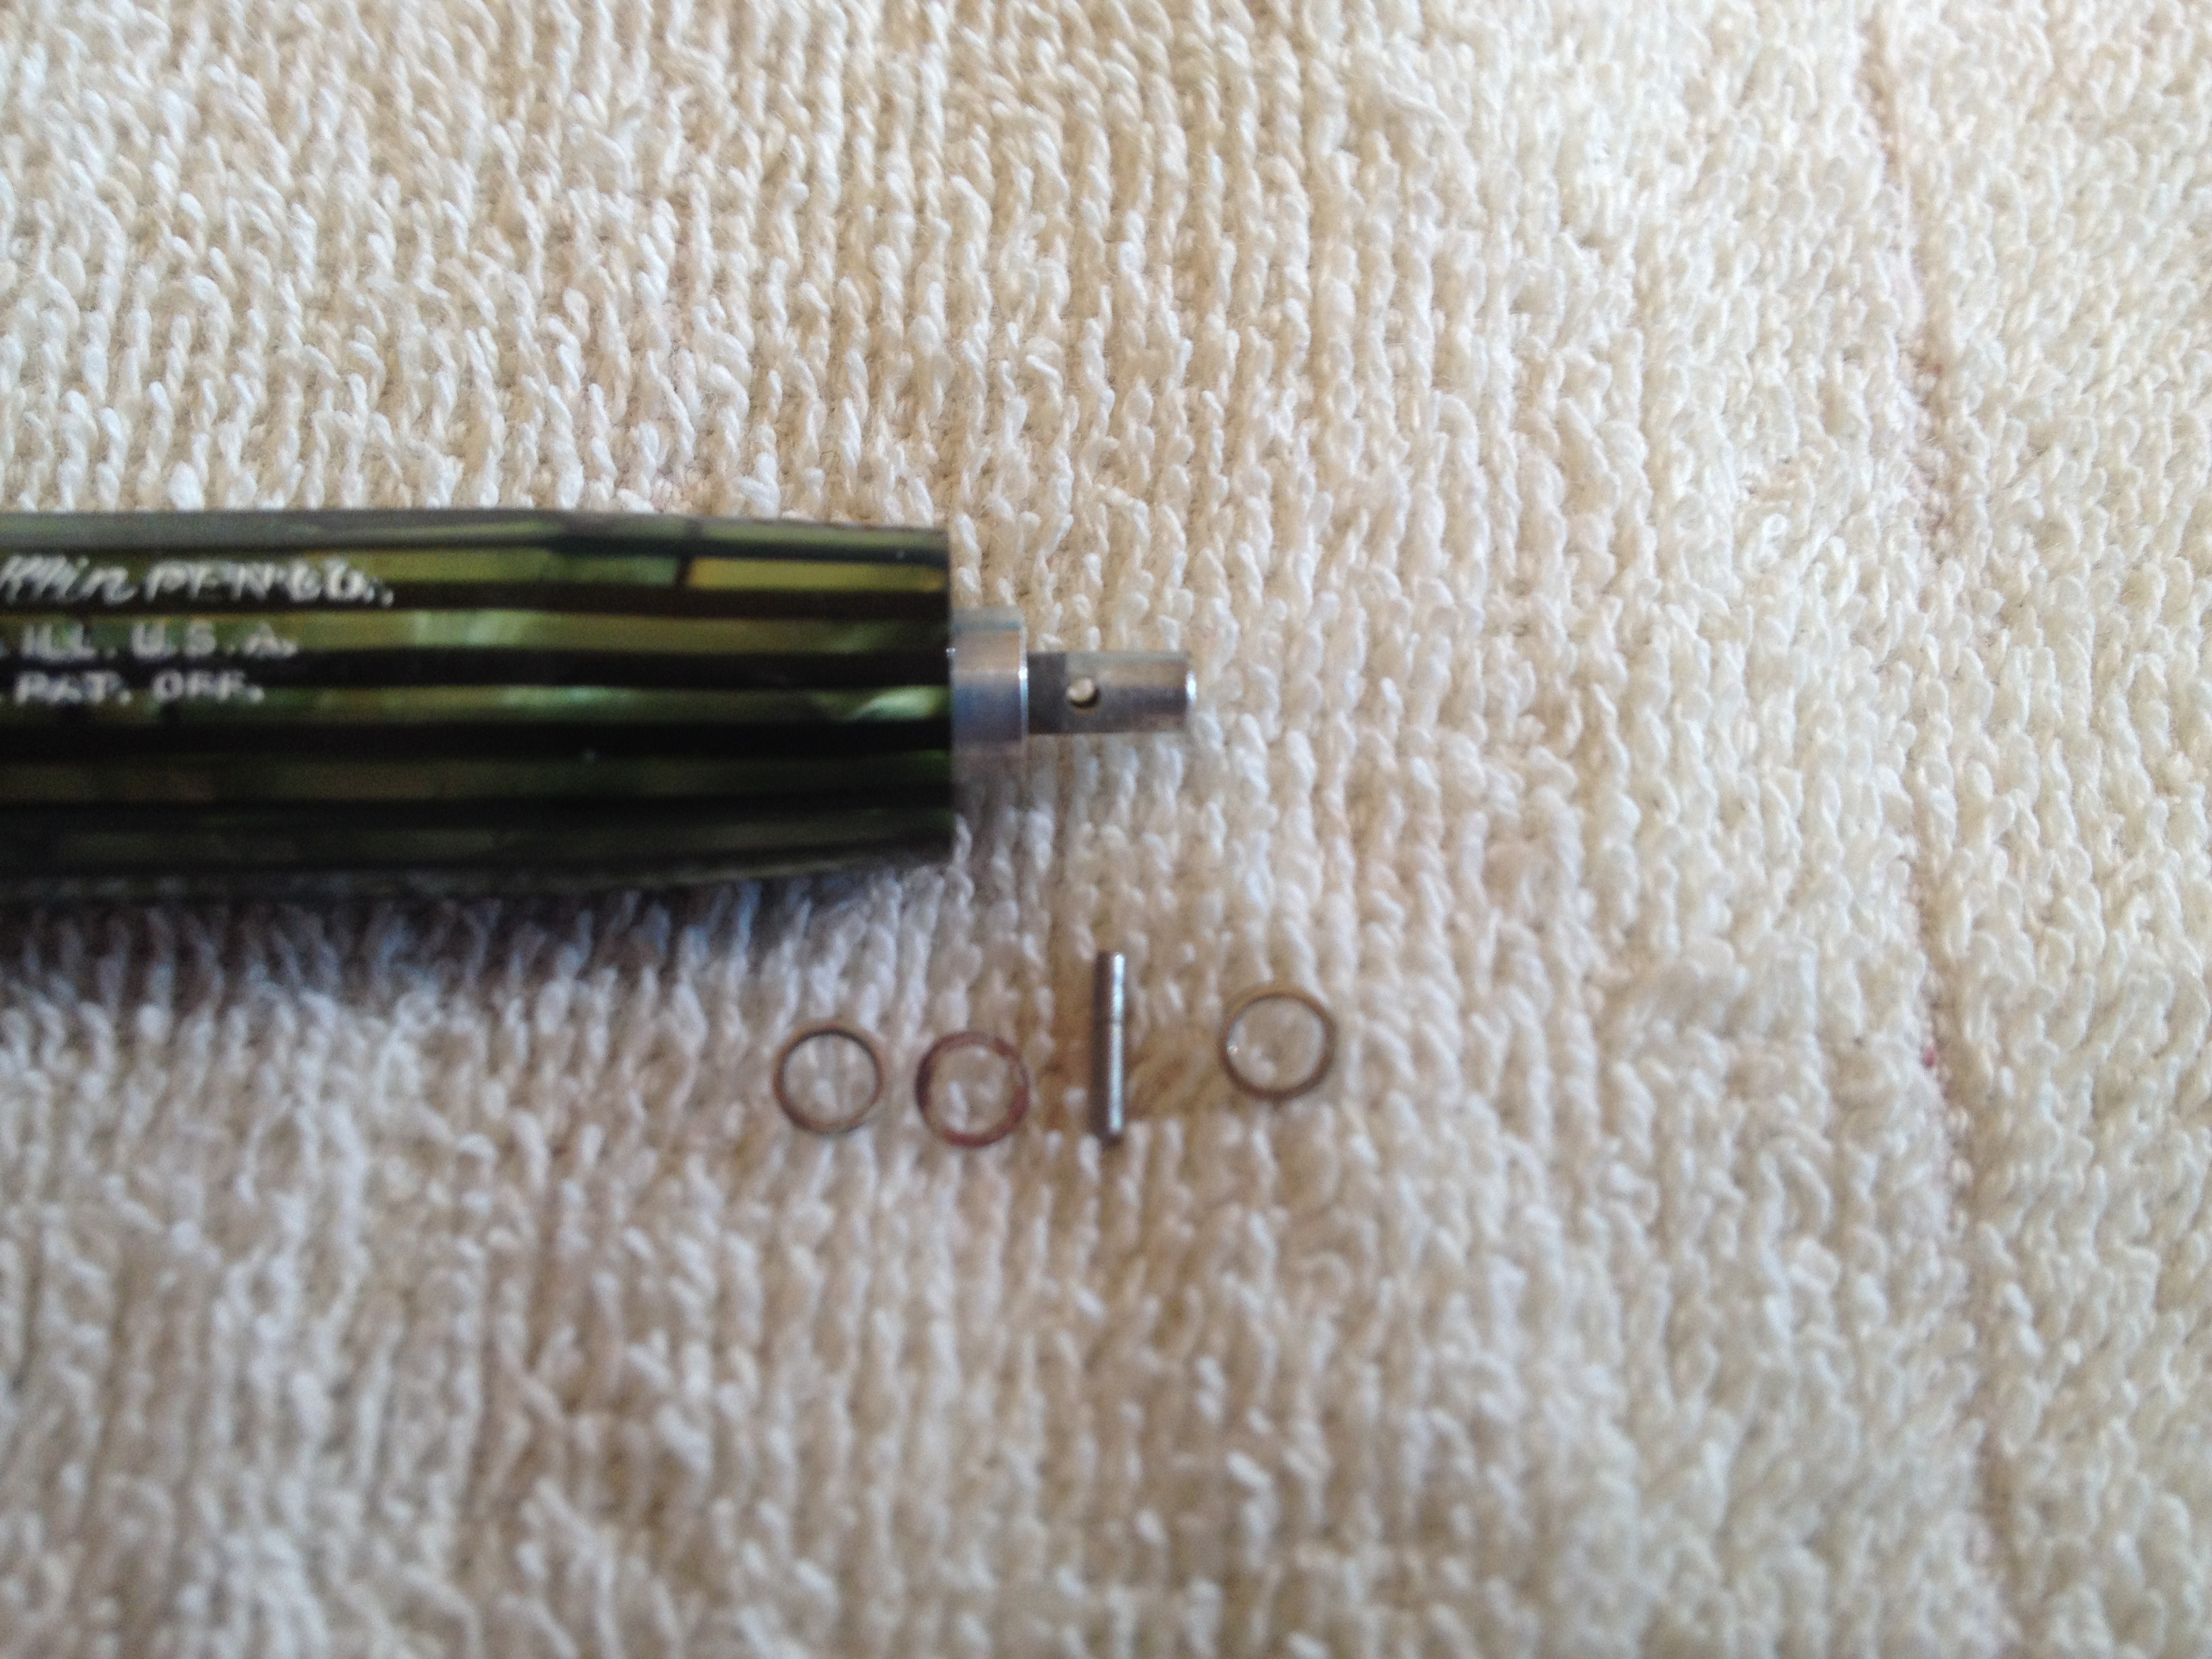 , leaving three washers and the pin. Once I had access to the piston mechanism I used a 3/32″ brass rod to push it from the rear of the pen through the section after it had been removed.
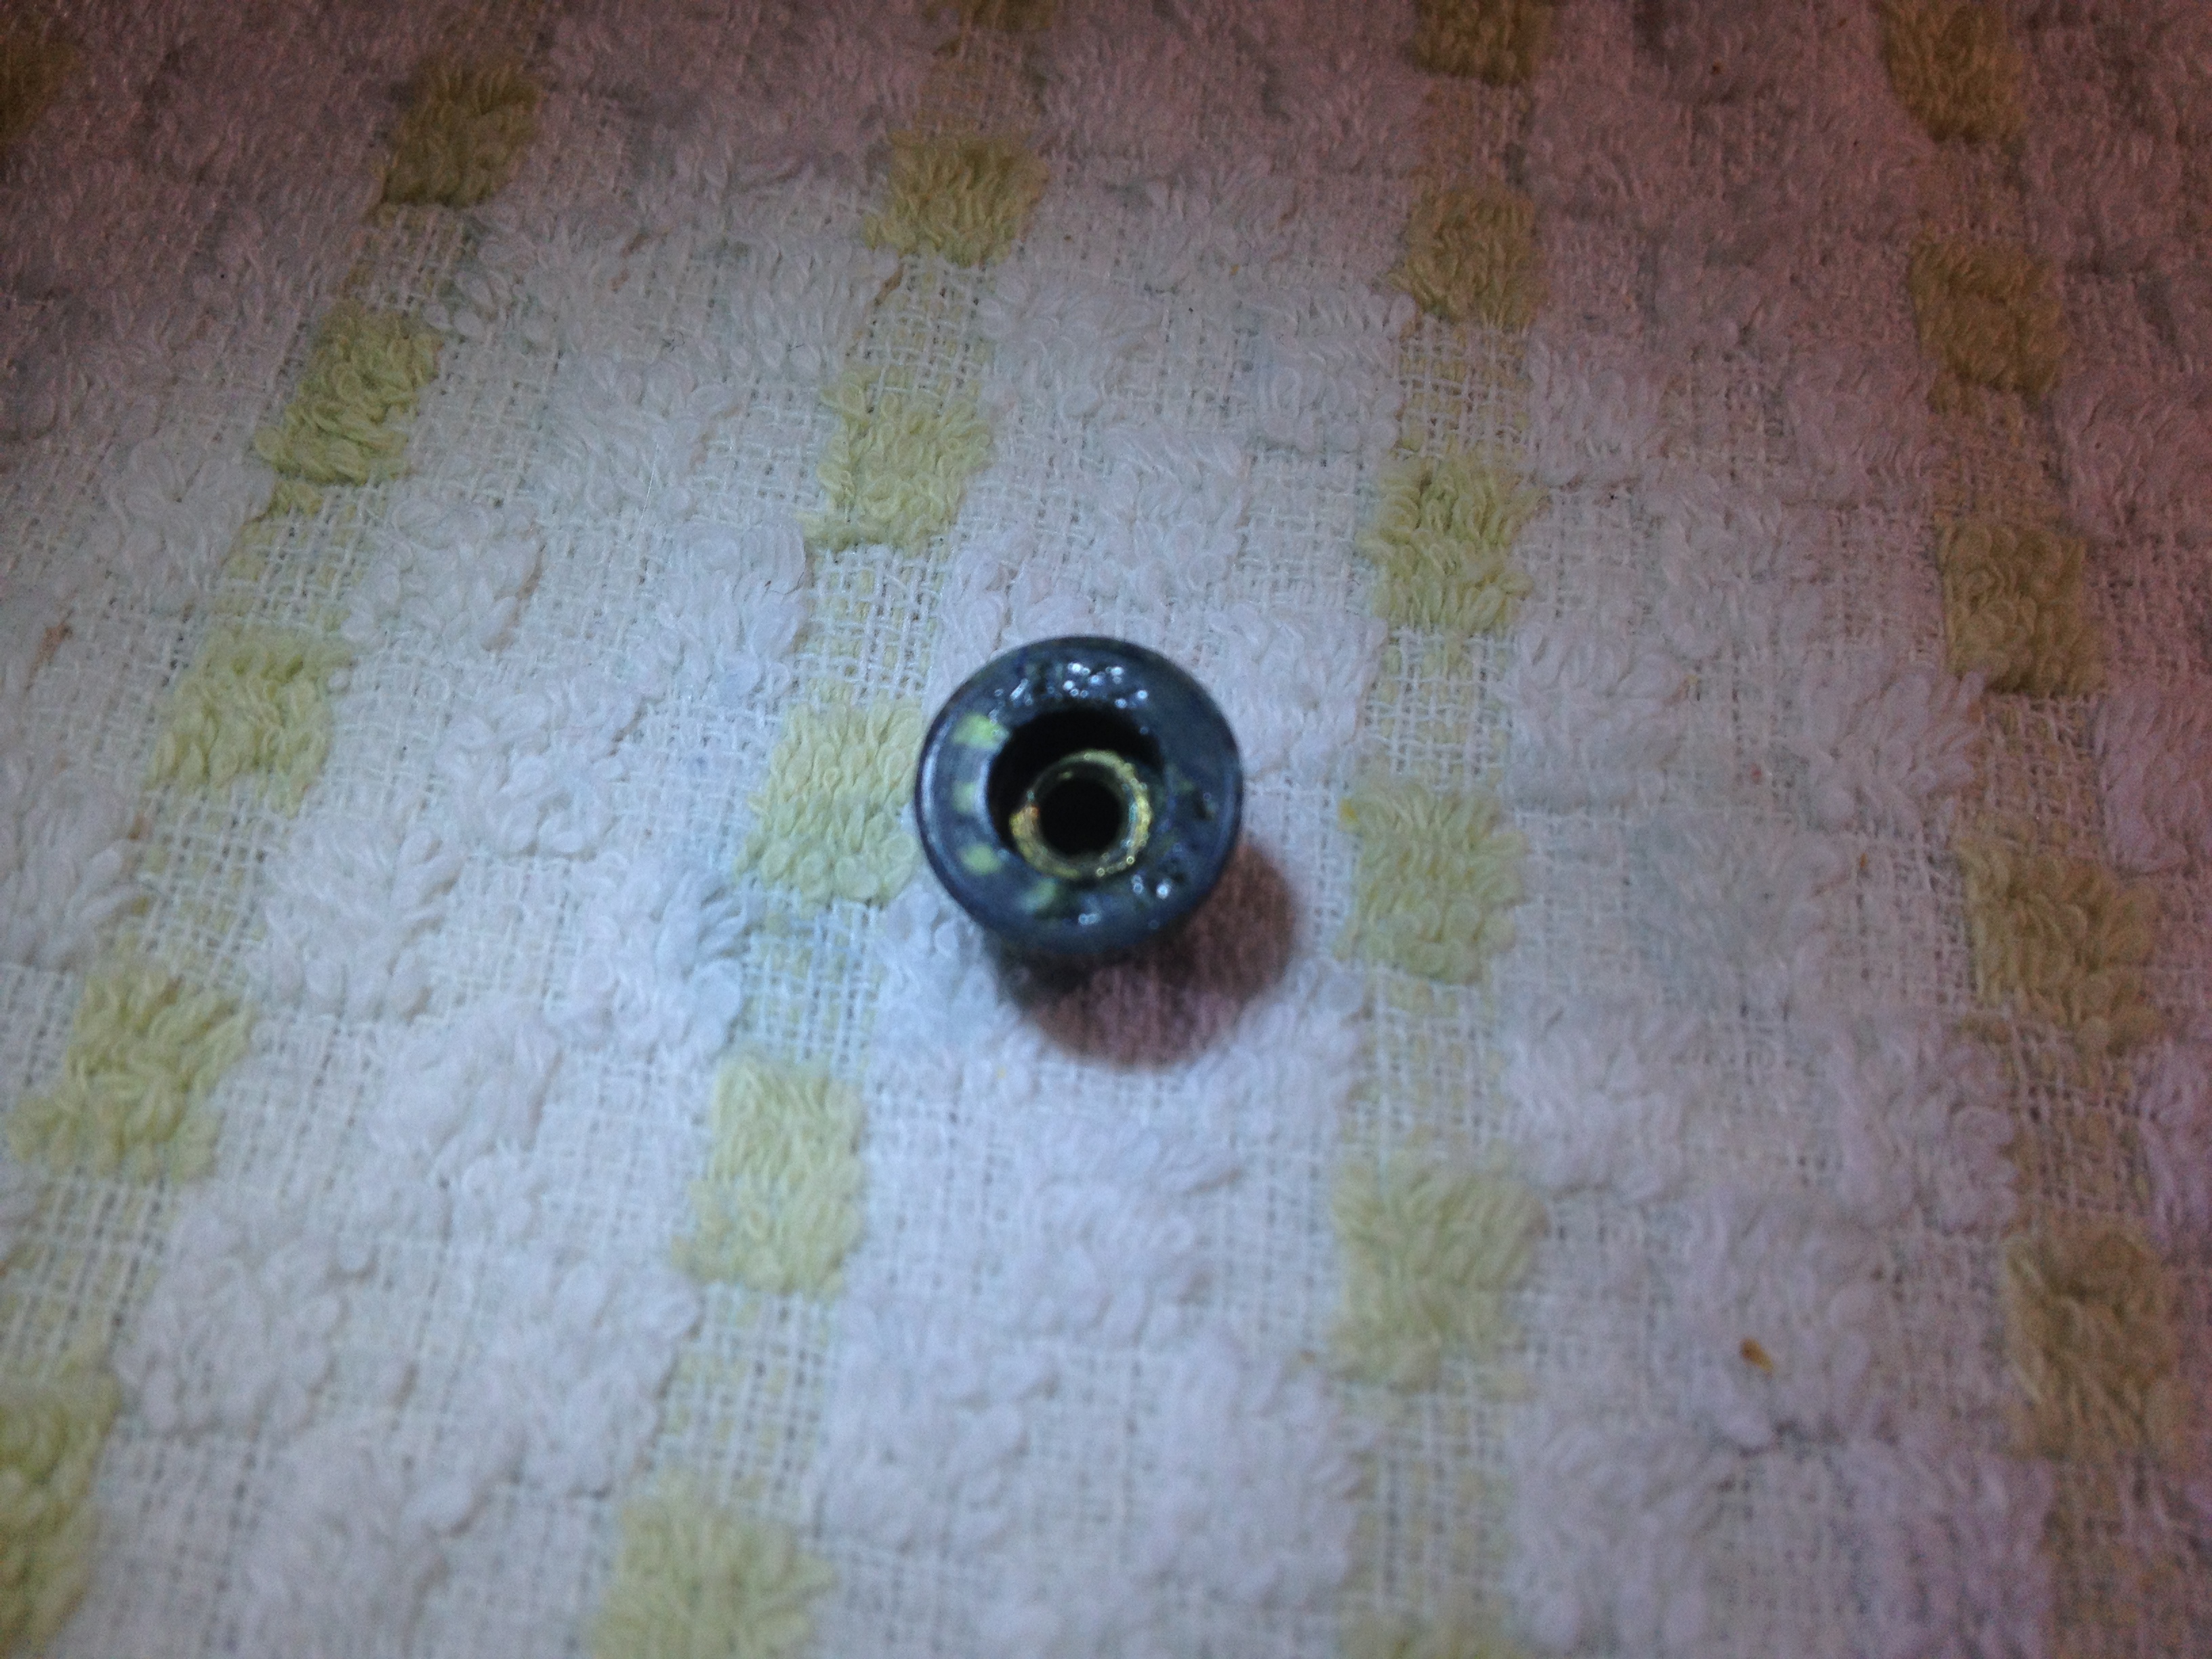
The third photo below is what I found, except that the old cork piston washers were completely hardened. They chipped away from the shaft with a sharp pick quite easily. I used two sized “C” replacement washers from the Conklin Nozac Repair Kit over at David Nishimura’s site Vintage Pens. They have a lot of great supplies and information over there and in the interest of full disclosure I have no affiliation with them whatsoever.

I don’t know if you can tell from the photo or not, but I coated the new piston seals (o’ rings, really) with a good amount of 100% pure silicone grease that I got from the good folks over at Goulet Pens, again no affiliation. If you’re into new fountain pens (and you should be!) and everything related, Goulet Pens is the place to go. Fantastic people and great service. 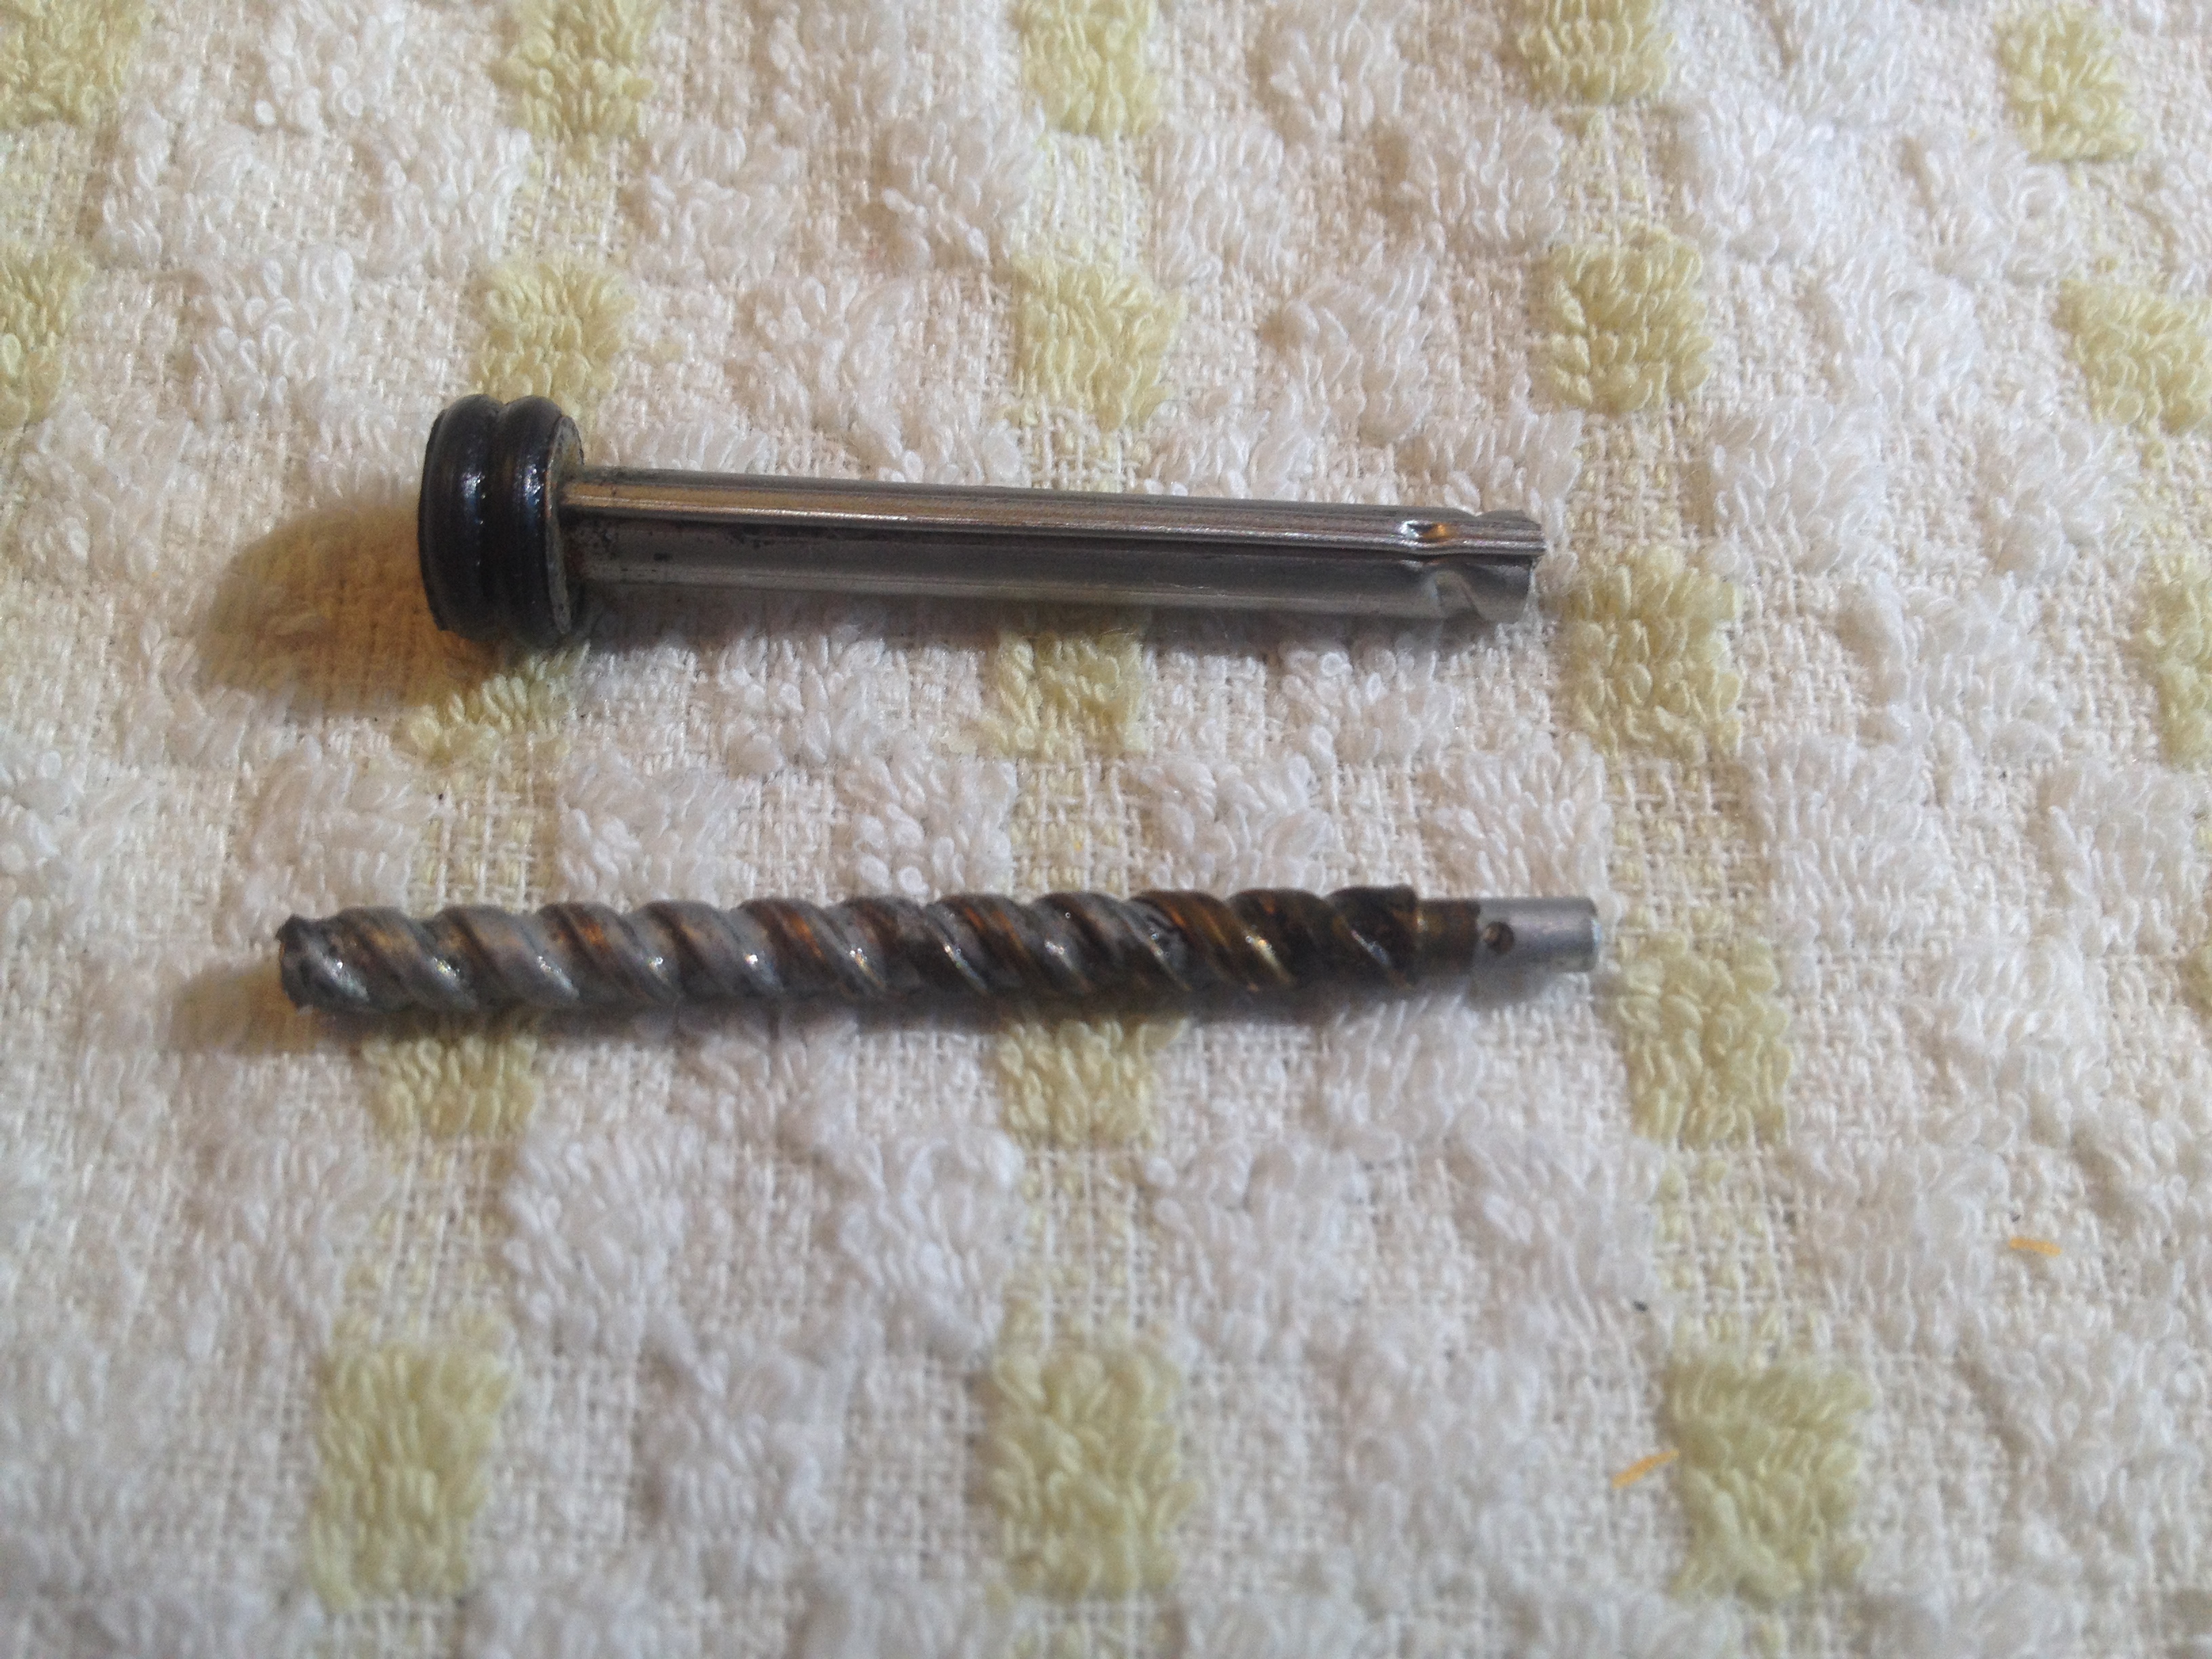
On the part of the piston shaft with the seals, note the ridge that runs length-wise along its entire top. We’ll come back to that in a bit. It’s important, and tricky, when reassembling the pen.
I did not soak any part of this pen in the ultrasonic cleaner for fear of ruining the barrel and cap color or the barrel and cap themselves. I did use the ultrasonic with a 10% ammonia solution on the piston rod and piston screw mechanism prior to installing the new seals. Instead, I used Koh-I-Noor Rapido-Eze Pen Cleaner at full strength with an appropriate sized bottle brush to clean the interior of the barrel and section. I did not let the solution set in there for any length of time. I merely filled the barrel up, shook it around for a second or two and worked the bottle brush up and down the inside of the barrel and section and the old ink came right off. That stuff is really good and a step or two up from a 10% ammonia solution – use with care.
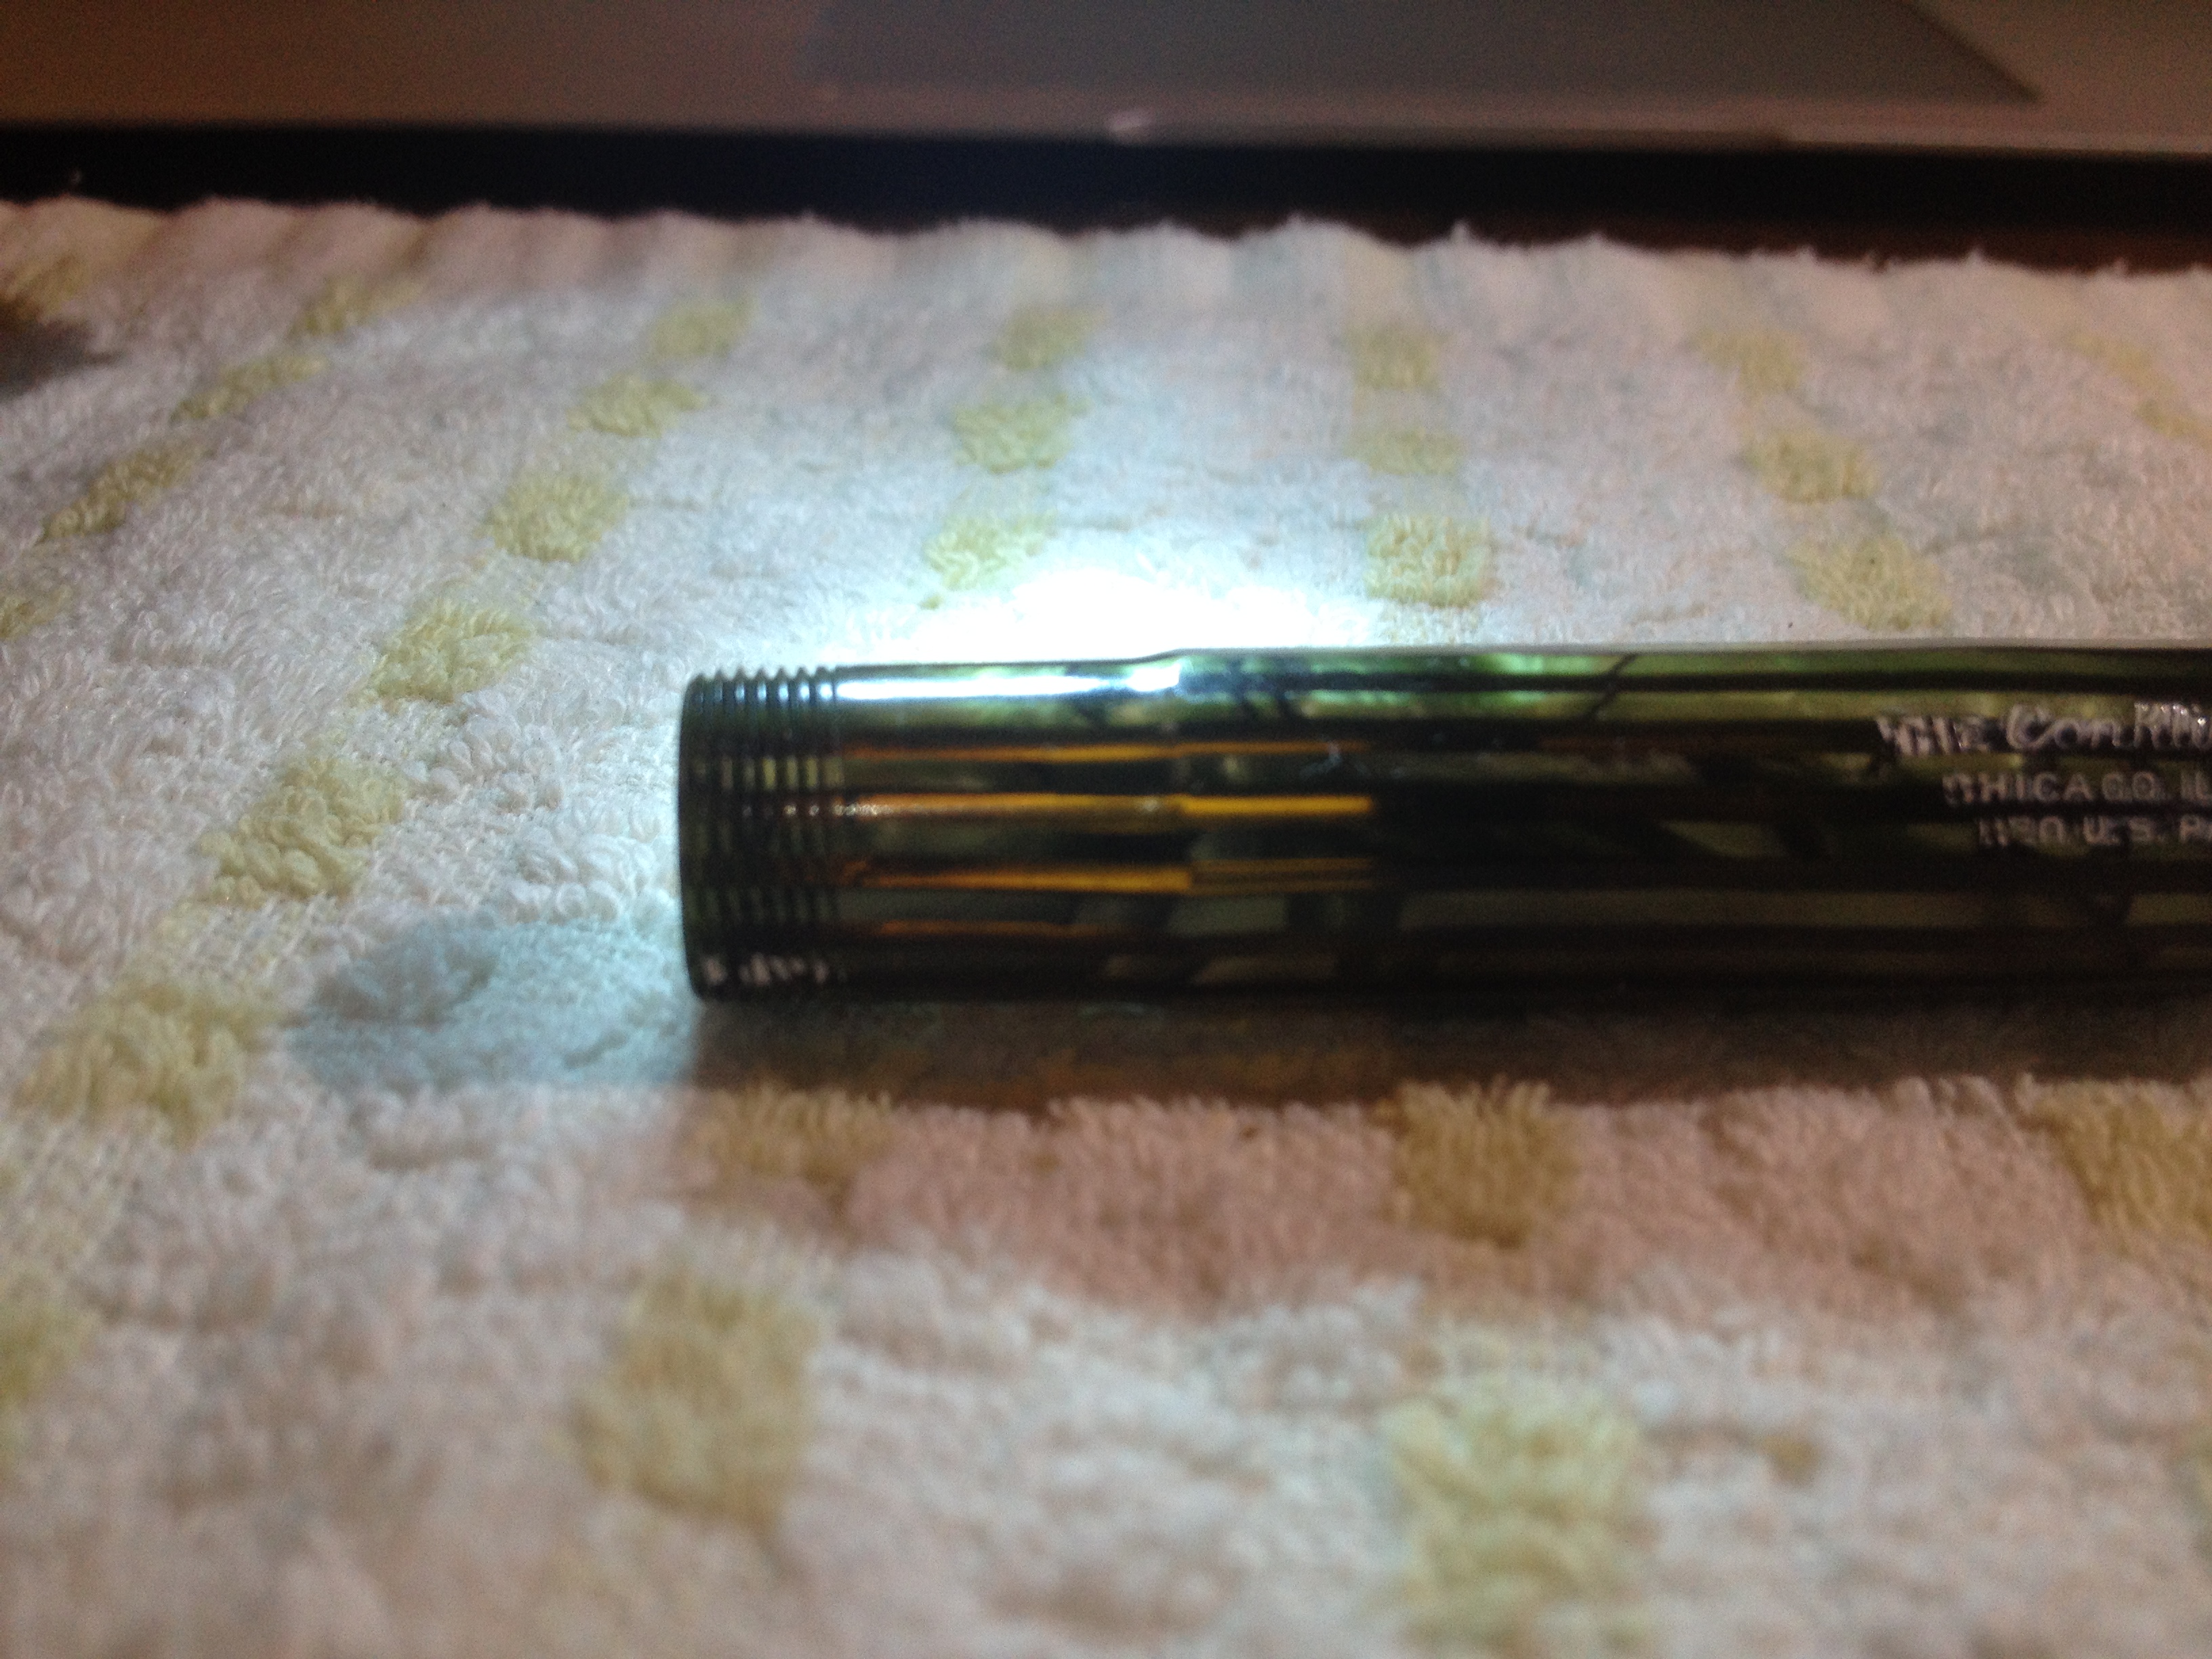
I did not remove the piston rod bushing from the end of the pen. It was simply not necessary and you want to be the least invasive as possible. This made reinsertion of the piston mechanism a little bit tricky, or as our friends across the pond might say, fiddly. The ridge on the piston rod I mentioned earlier fits in either of two grooves (it doesn’t matter which one) on the inside of the bushing at the rear of the pen and serves to align and stabilize the mechanism inside the pen. 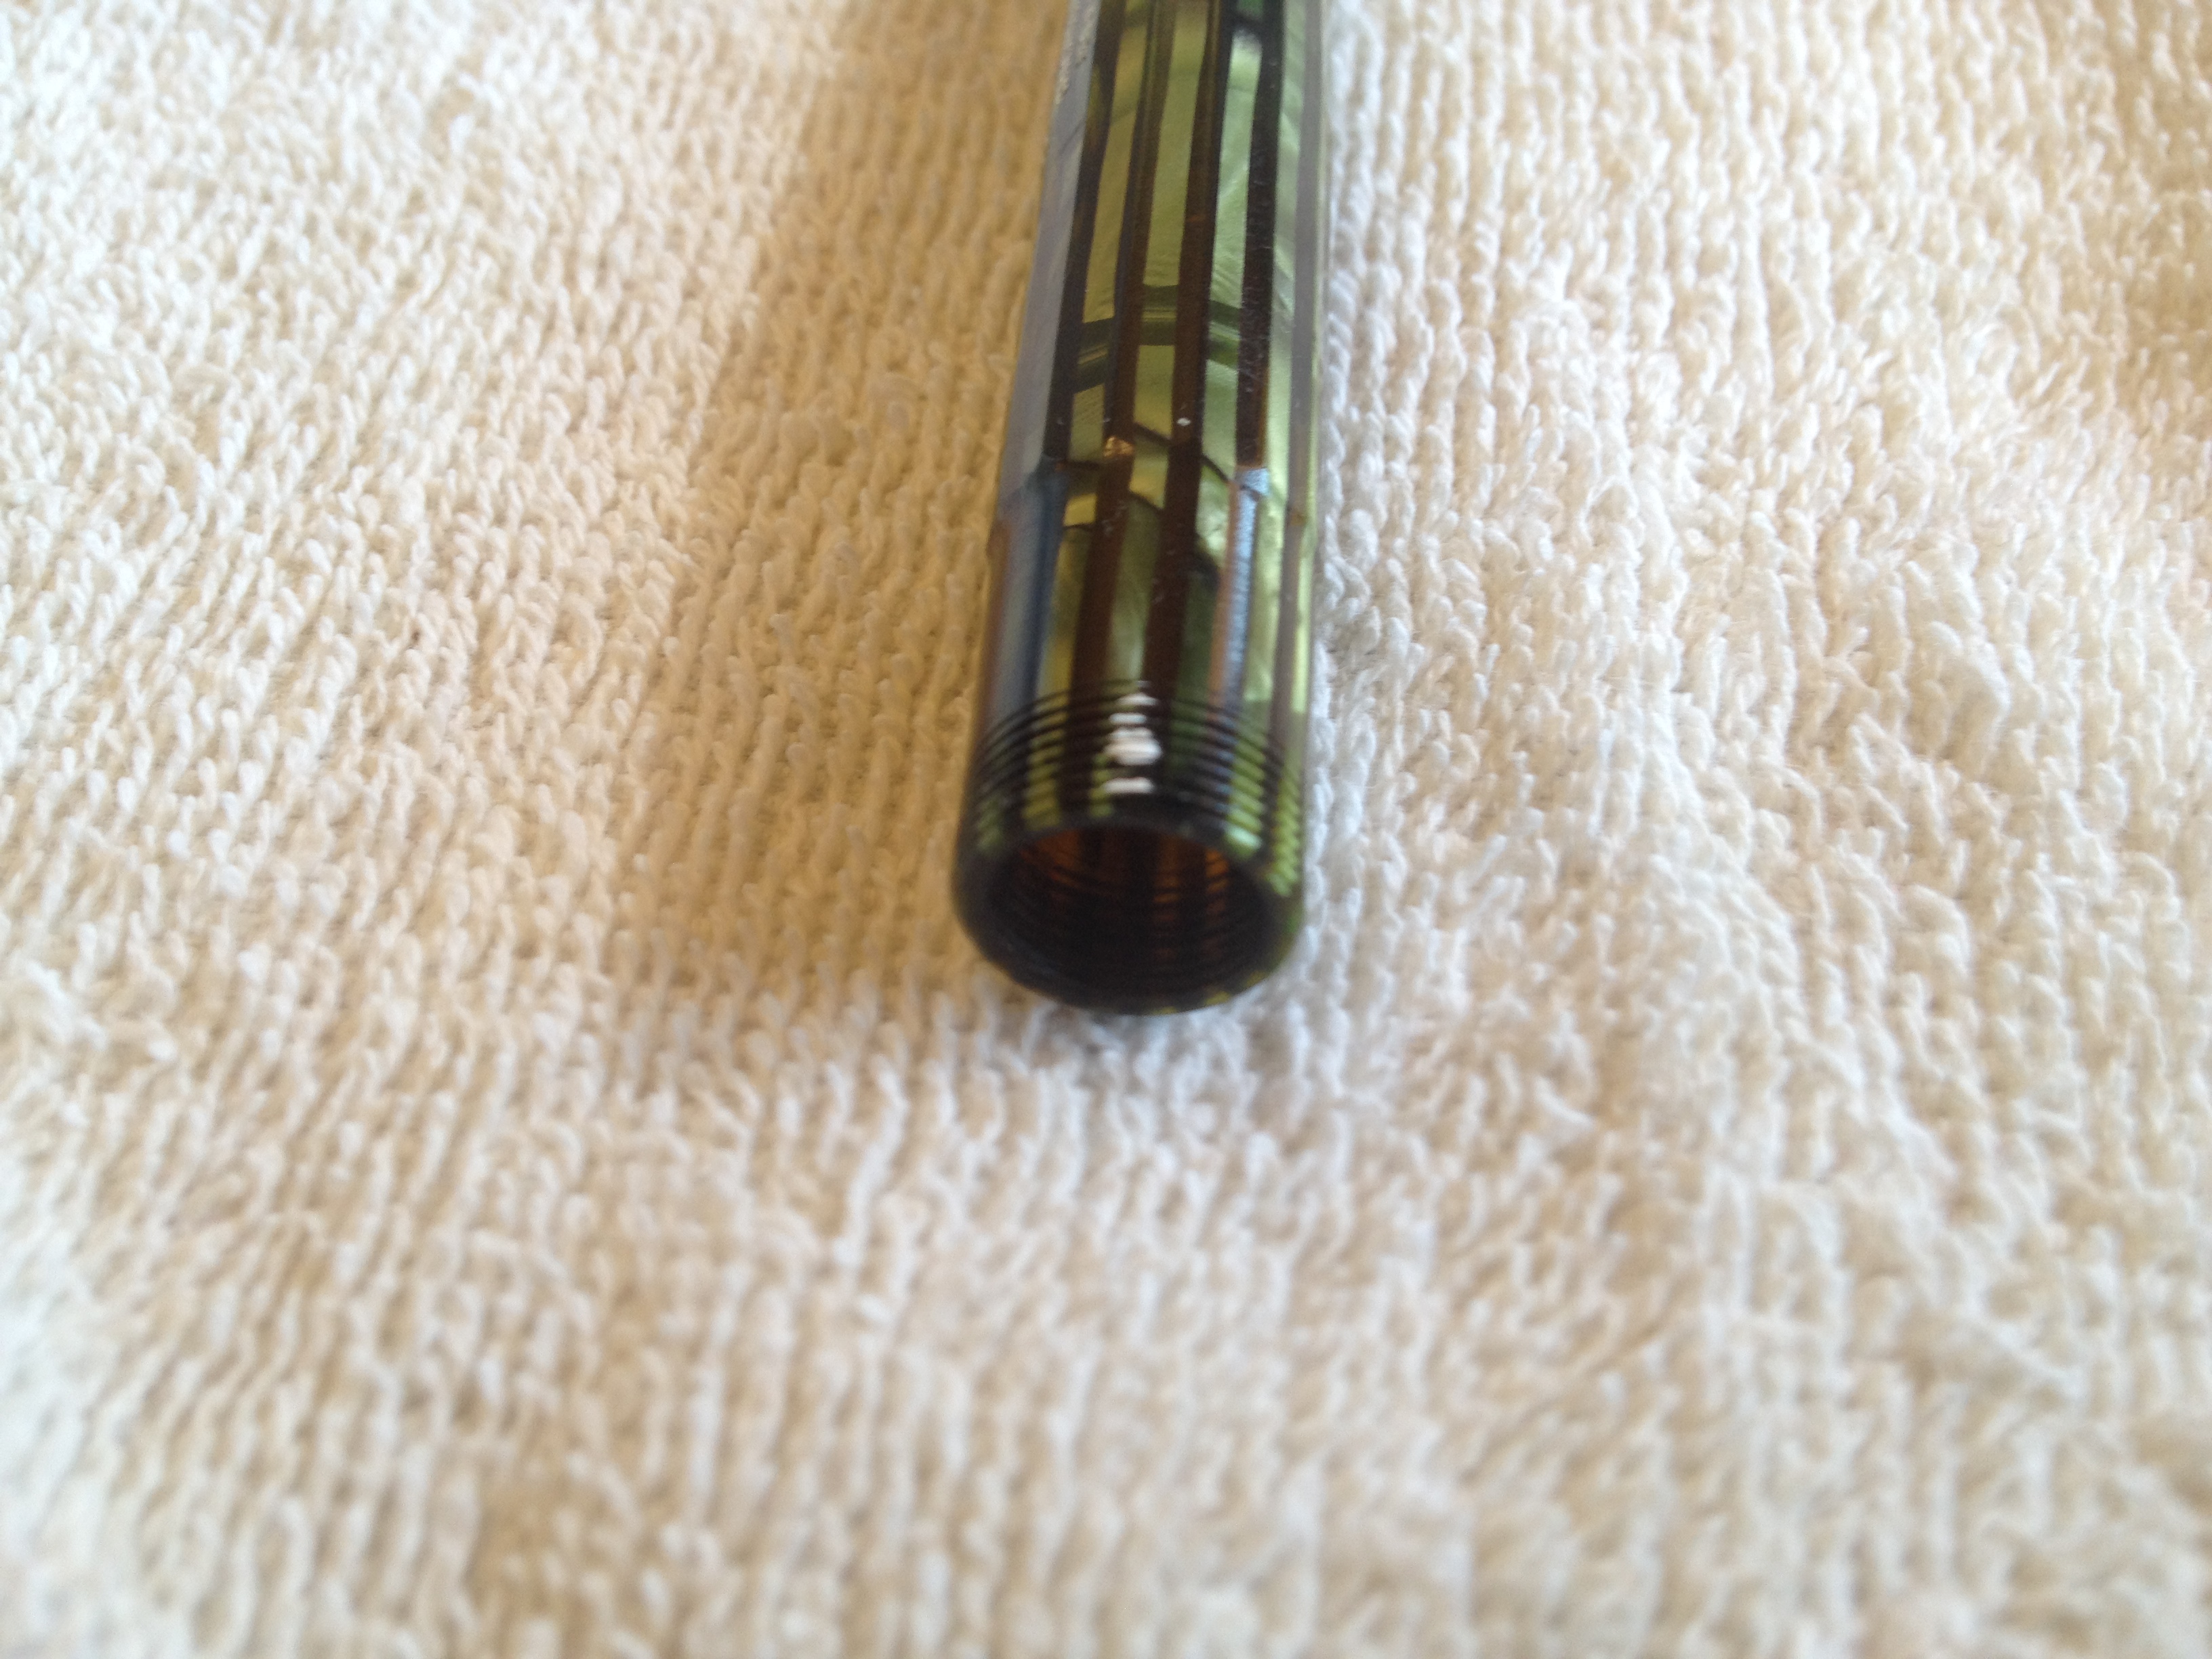 I aligned the ridge on the piston rod and visually lined it up with the interior slots in the bushing and marked the barrel threads with a white Berol Mirado China Marker, which is essentially just a fancy colored grease pencil. This allowed me to know approximately where the slot was in the bushing as I began to reinstall the piston rod from the section-end of the pen.
One thing that caused some difficulty was getting the threaded end of the piston rod to e xit the bushing at the end of the pen so I could reinstall the washers, pin, and end cap. What to do? I took a long piece of music wire (available at any hobby or craft store) and inserted through the bushing from the end of the pen and out the section end. Then I sat the fully-extended piston rod over the music wire and aligned the ridge with the white mark on the barrel threads. After a little finesse and some back and forth realignment I could feel the ridge engage with notch in the bushing.
I then pushed the piston mechanism  from the section-end of the pen with a brass rod, allowing the music wire to guide the threaded portion of the piston out the end of the pen. I retracted the piston fully into the pen and applied a coating of silicone grease on the inside of the barrel. After making sure the piston was working properly and with just the right amount of resistance I then reinstalled the washers and end cap and reinserted the push pin to hold the cap in place.
Now for the next major milestone, the leak test. Actually before I reinstalled the end cap, I filled the barrel to the top with Parker Quink Washable Blue Ink, wrapped the barrel lightly in tissue and placed it vertically in a Nalgene bottle. I let it sit like this for over 48 hours and as you can see, fortunately, there is no blue ink at the bottom of the vial or on the tissue. Leakproof success!

From there it was easy to reassemble the rest of the pen with an assist from a set of nib pliers to fully seat the nib and feed in the section. I used a little bit of water-based diaphragm lubricant from the folks at Fountain Pen Sacs and along with a little nudge from the nib pliers in she went, perfectly seated.
Another critical step that should not be overlooked is to check the nib to cap depth relationship so that you don’t accidentally destroy a costly and sometimes irreplaceable nib. Believe it or not I have had a very expensive “fully restored” Parker Vacumatic come to me from a highly respected and long-time EBay seller with the nib and feed not fully set in the section by about a quarter of an inch. Fortunately I caught it in time before I had a severely twisted nib.


The inner cap depth gauge tool is simply about a 6″ piece of 3/32 brass rod rounded off at both ends inside a 4″ section of 3/16 OD brass tubing. Handiest tool ever invented by modern man, at least when it comes to protecting expensive nibs and avoiding costly mistakes. Make yourself one and use it! This is the first Conklin Nozac I have ever restored and I think it turned out pretty good. It is an absolutely beautiful pen in near mint condition.
The barrel transparency on this thing is absolutely amazing!

As I mentioned earlier I lucked in to it from a bag of junkers on EBay. It leaves me with a smile! Coming soon I’ll show the restoration of the Parker 51 Aerometric and the genuine Parker DuoVac, VacuFold from the same batch. The VacuFold is truly extraordinary.
Let me know what you think in the comments section and don’t forget to visit our store, Triumph Vintage Pens and check us out on EBay under our seller ID “triumphvintagepens”.
If I can be of help to you in any way, please feel free to reach out to me.
– Glenn Atkins
For the full gallery related to this restoration, check out the slideshow on PhotoBucket.