parker vacufold restoration
Restoration & Service Of A Genuine 1942 Blue Striated Parker DuoVac VacuFold
Greetings! This 1942 Parker Blue Striated DuoVac / VacuFold is the second of three really nice pens I lucked in to when I purchased what appeared to be a junker lot on Ebay. The first one we talked about was this green striated Conklin Nozac that I restored to near-mint condition. The third in this series will be a near-mint Parker 51 from the same lot.
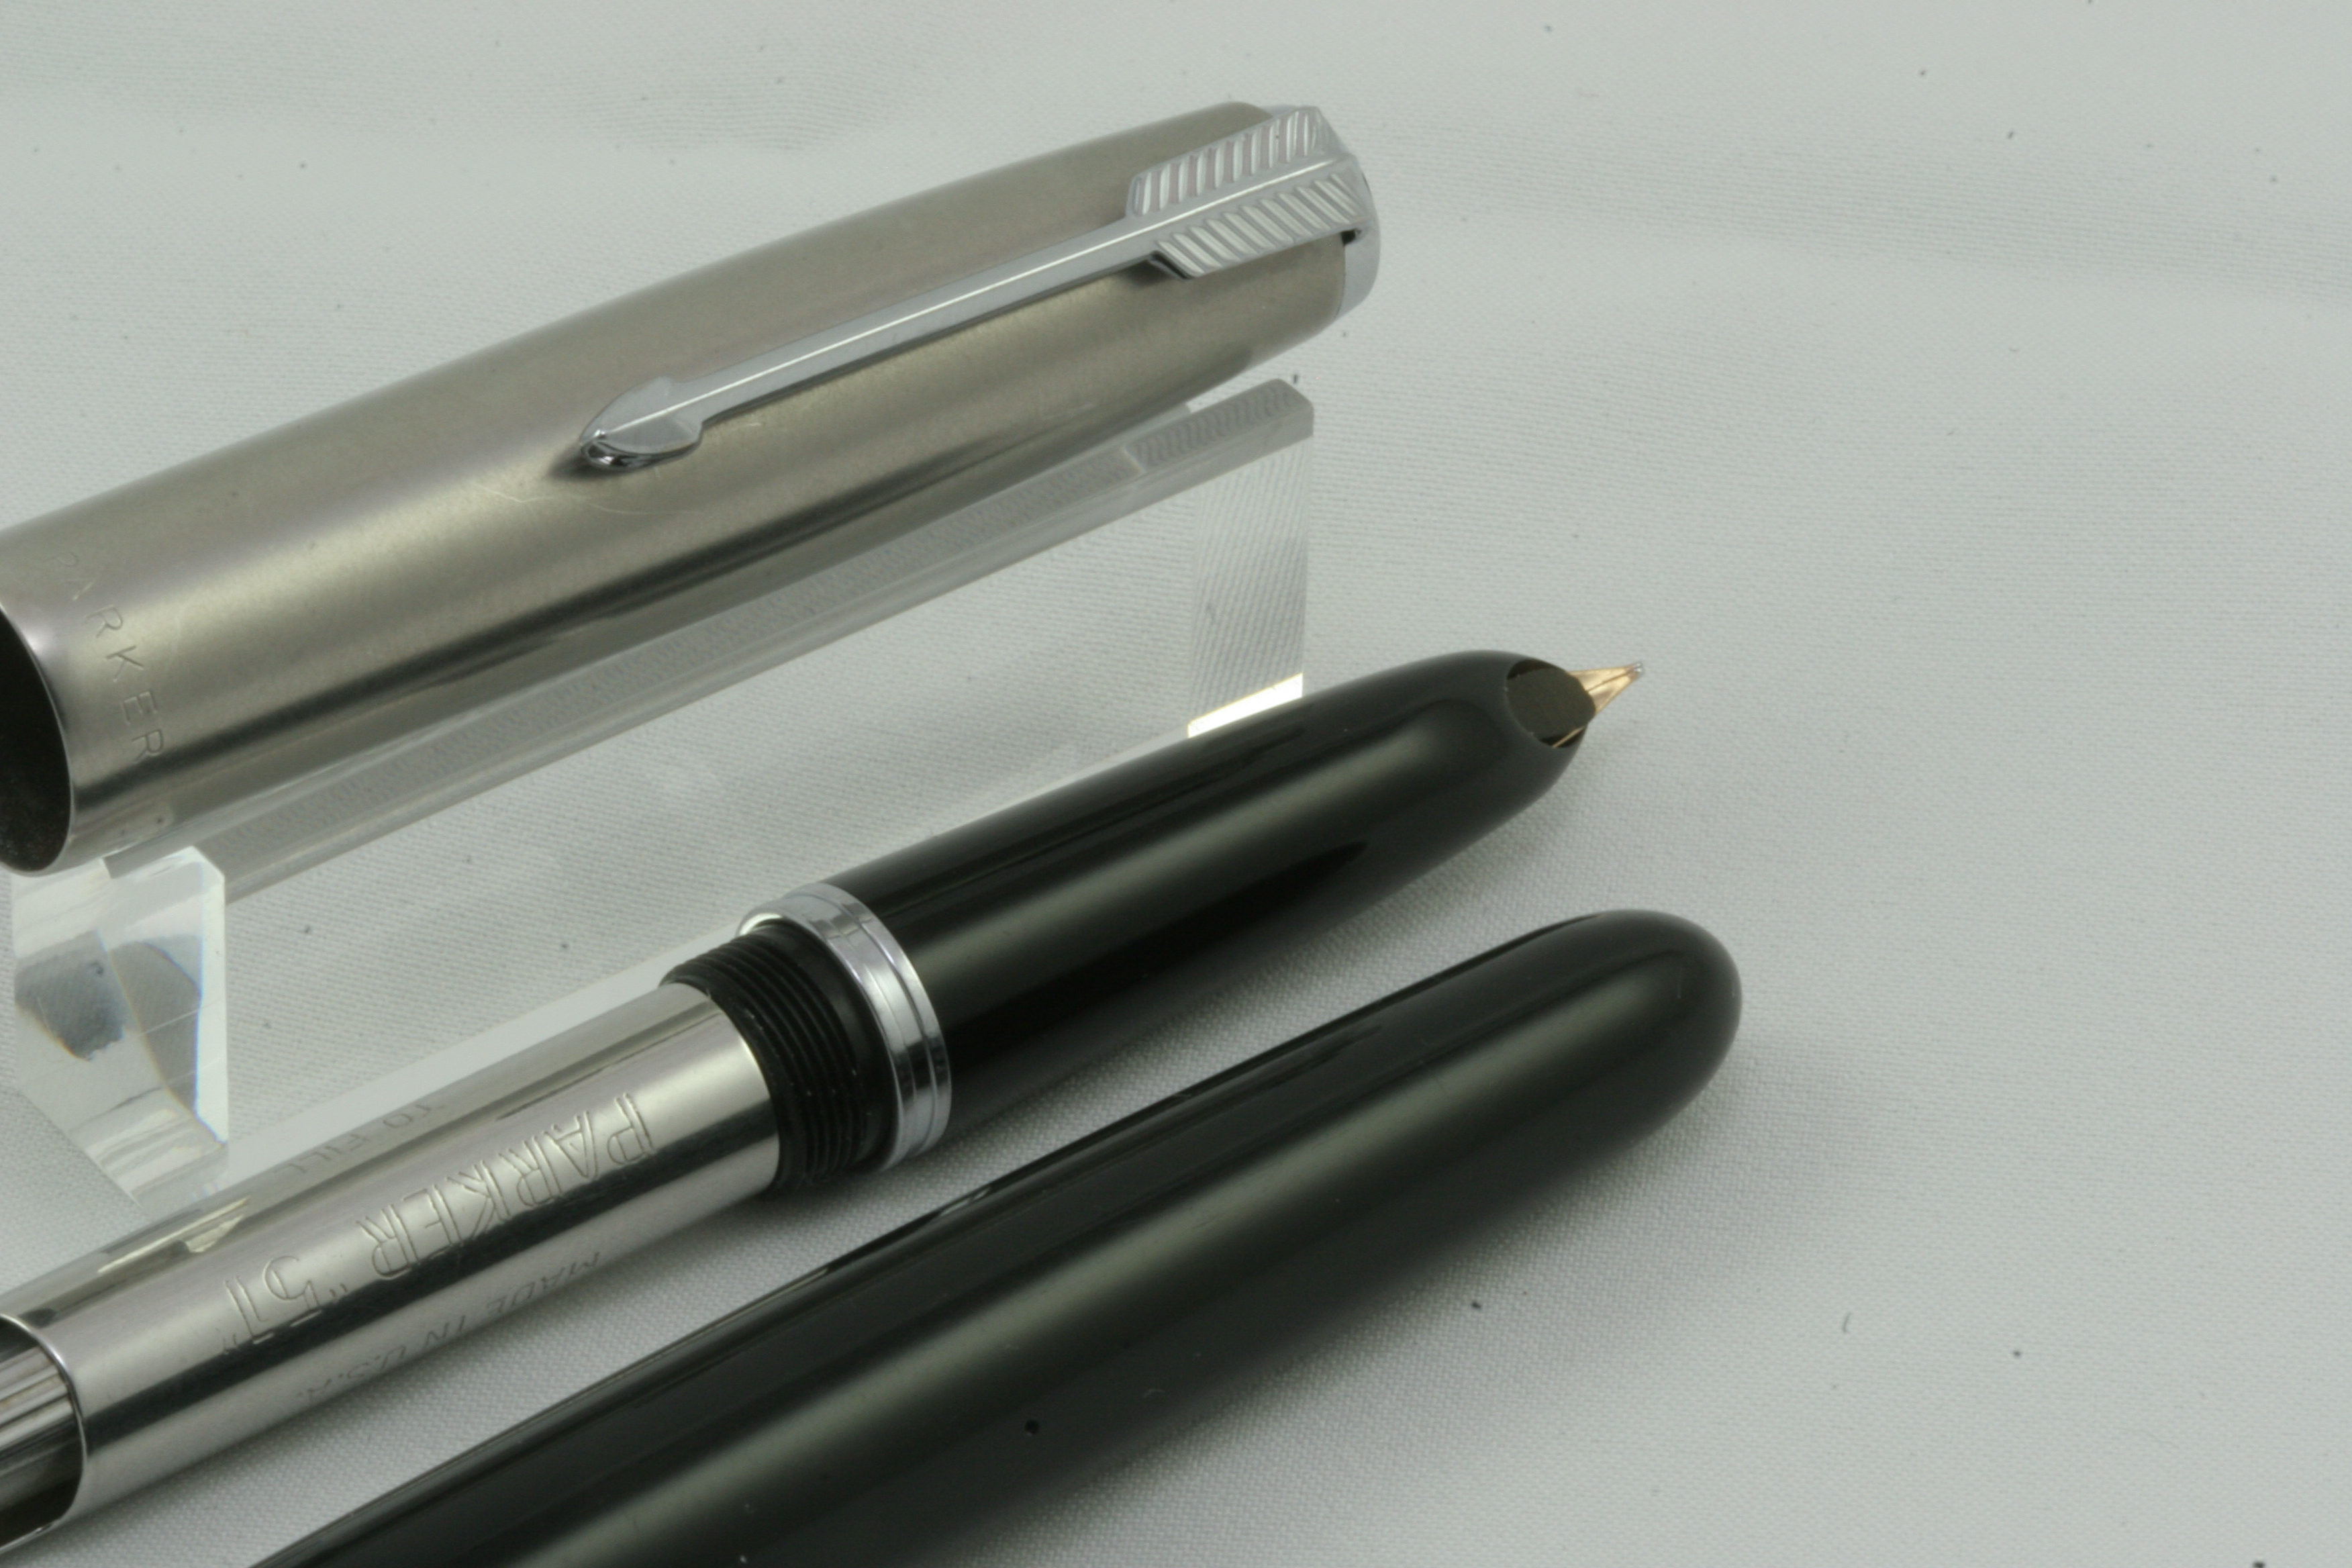
Here’s a picture of the Conklin Nozac and the Parker 51 Aerometric.

As I mentioned, I acquired this pen when I came across an EBay auction not long ago that contained one fuzzy, out-of-focus picture much like the one shown below of 15 or twenty pens up for sale. There was much discussion in a thread over on Fountain Pen Network about this particular lot.

Today, let’s restore this beautiful DuoVac.

First, six things to note that authenticate the provenance of this pen: 1) It is made out of DuoFold stock, 2) It is marked “Vacumatic” on the barrel, 3) It sports a split-arrow Parker Vacumatic clip and not a DuoFold clip, 5) It came with a regular Vacumatic nib, 5) It uses the traditional Vacumatic plastic plunger filler, and 6) It has what is known as a “Jewellers” or “coin-stacked” cap band.
Here’s a picture of a traditional DuoFold clip (yeah, I know it needs some work, it’s in the queue).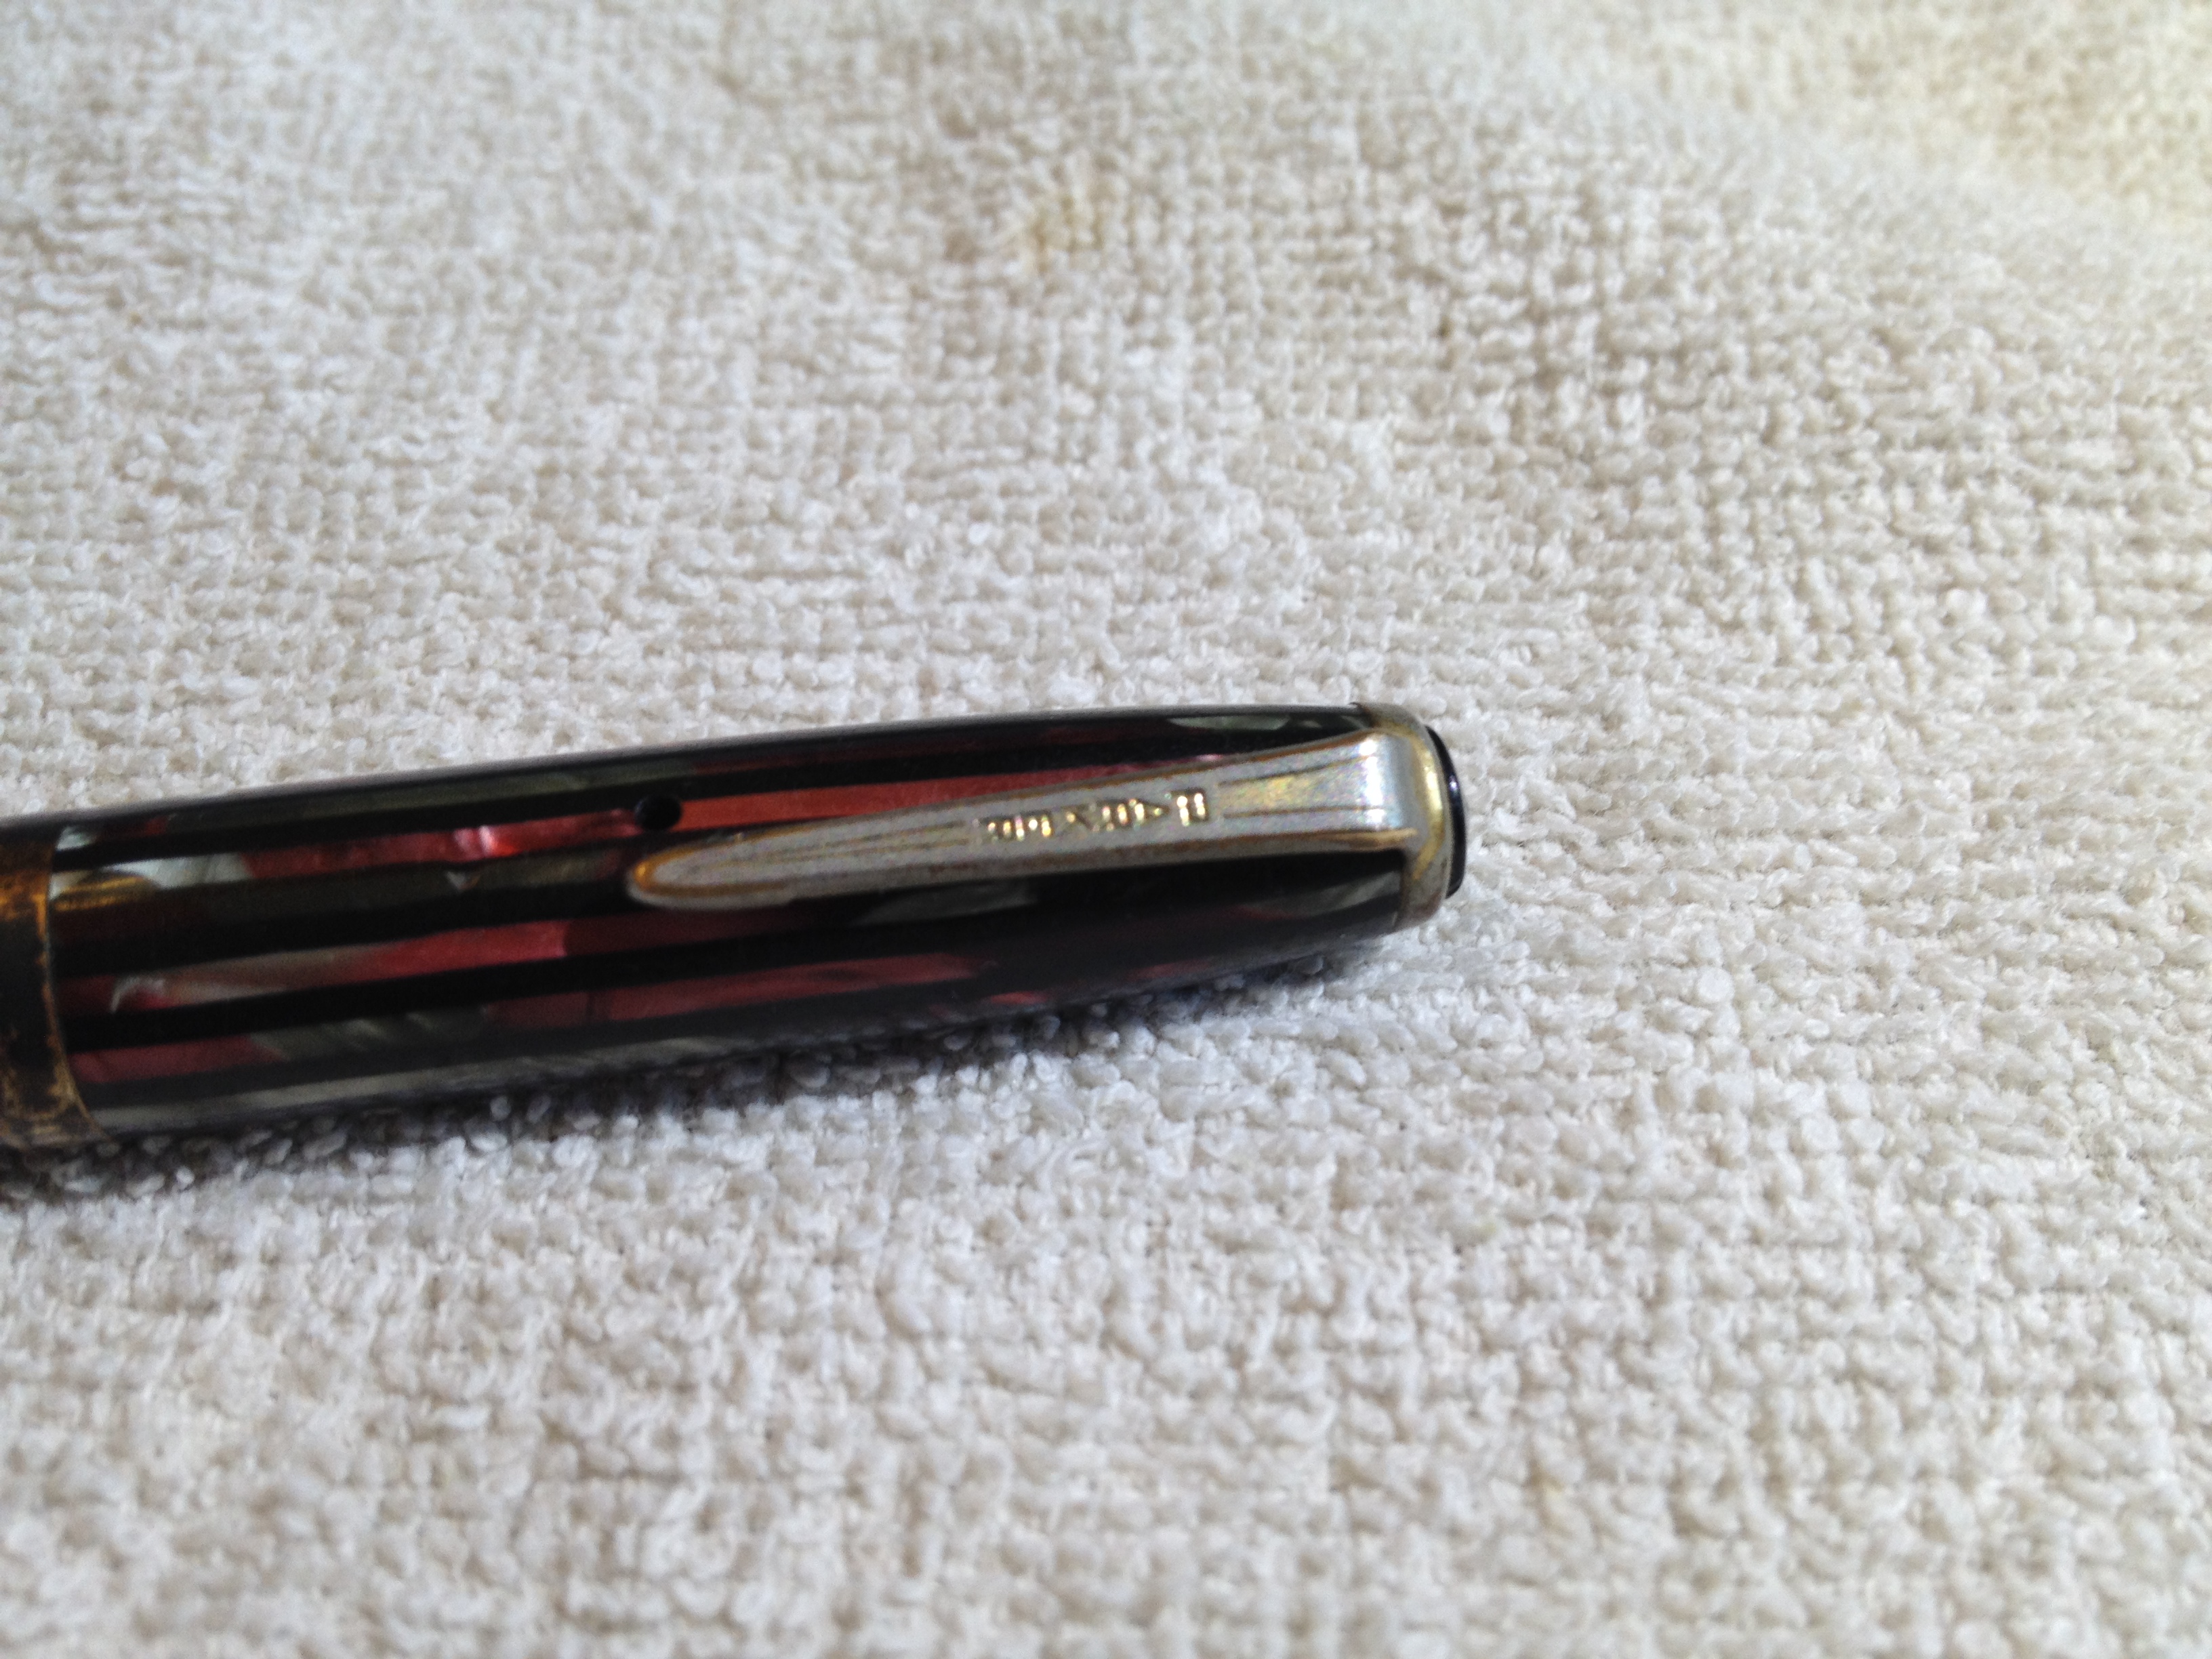 This particular style of Parker DuoVac / VacuFold is mentioned with some specificity on pages 188-189 in David Shepherd’s book Parker Vacumatic. I got my copy from Frank Fiorella at Pendemonium.
Mr. Shepherd describes the VacuFold as “an unusual variation” that “was produced in late 1942 to early 1943.” Tony Fischier at Parker Collector refers to the VacuFold as “very rare” (scroll to the last photo on the Parker Collector link to see a red version). Tony got his photo from David Isaacson at Vacumania. These guys are way more knowledgable than I am. Spend some time on their websites.
Anyway, on to the restoration. This pen restores just like any standard Parker Vacumatic. The most important thing to remember is to use well-controlled and incremental dry-heat to disassemble the pen. With a Parker 51 you can use hot water, but that’s for another post and I only use dry-heat on Vacumatics and DuoFolds. I have this particular heat gun from Milwaukee. It’s a model 8988-20 and I got it from this seller on EBay.
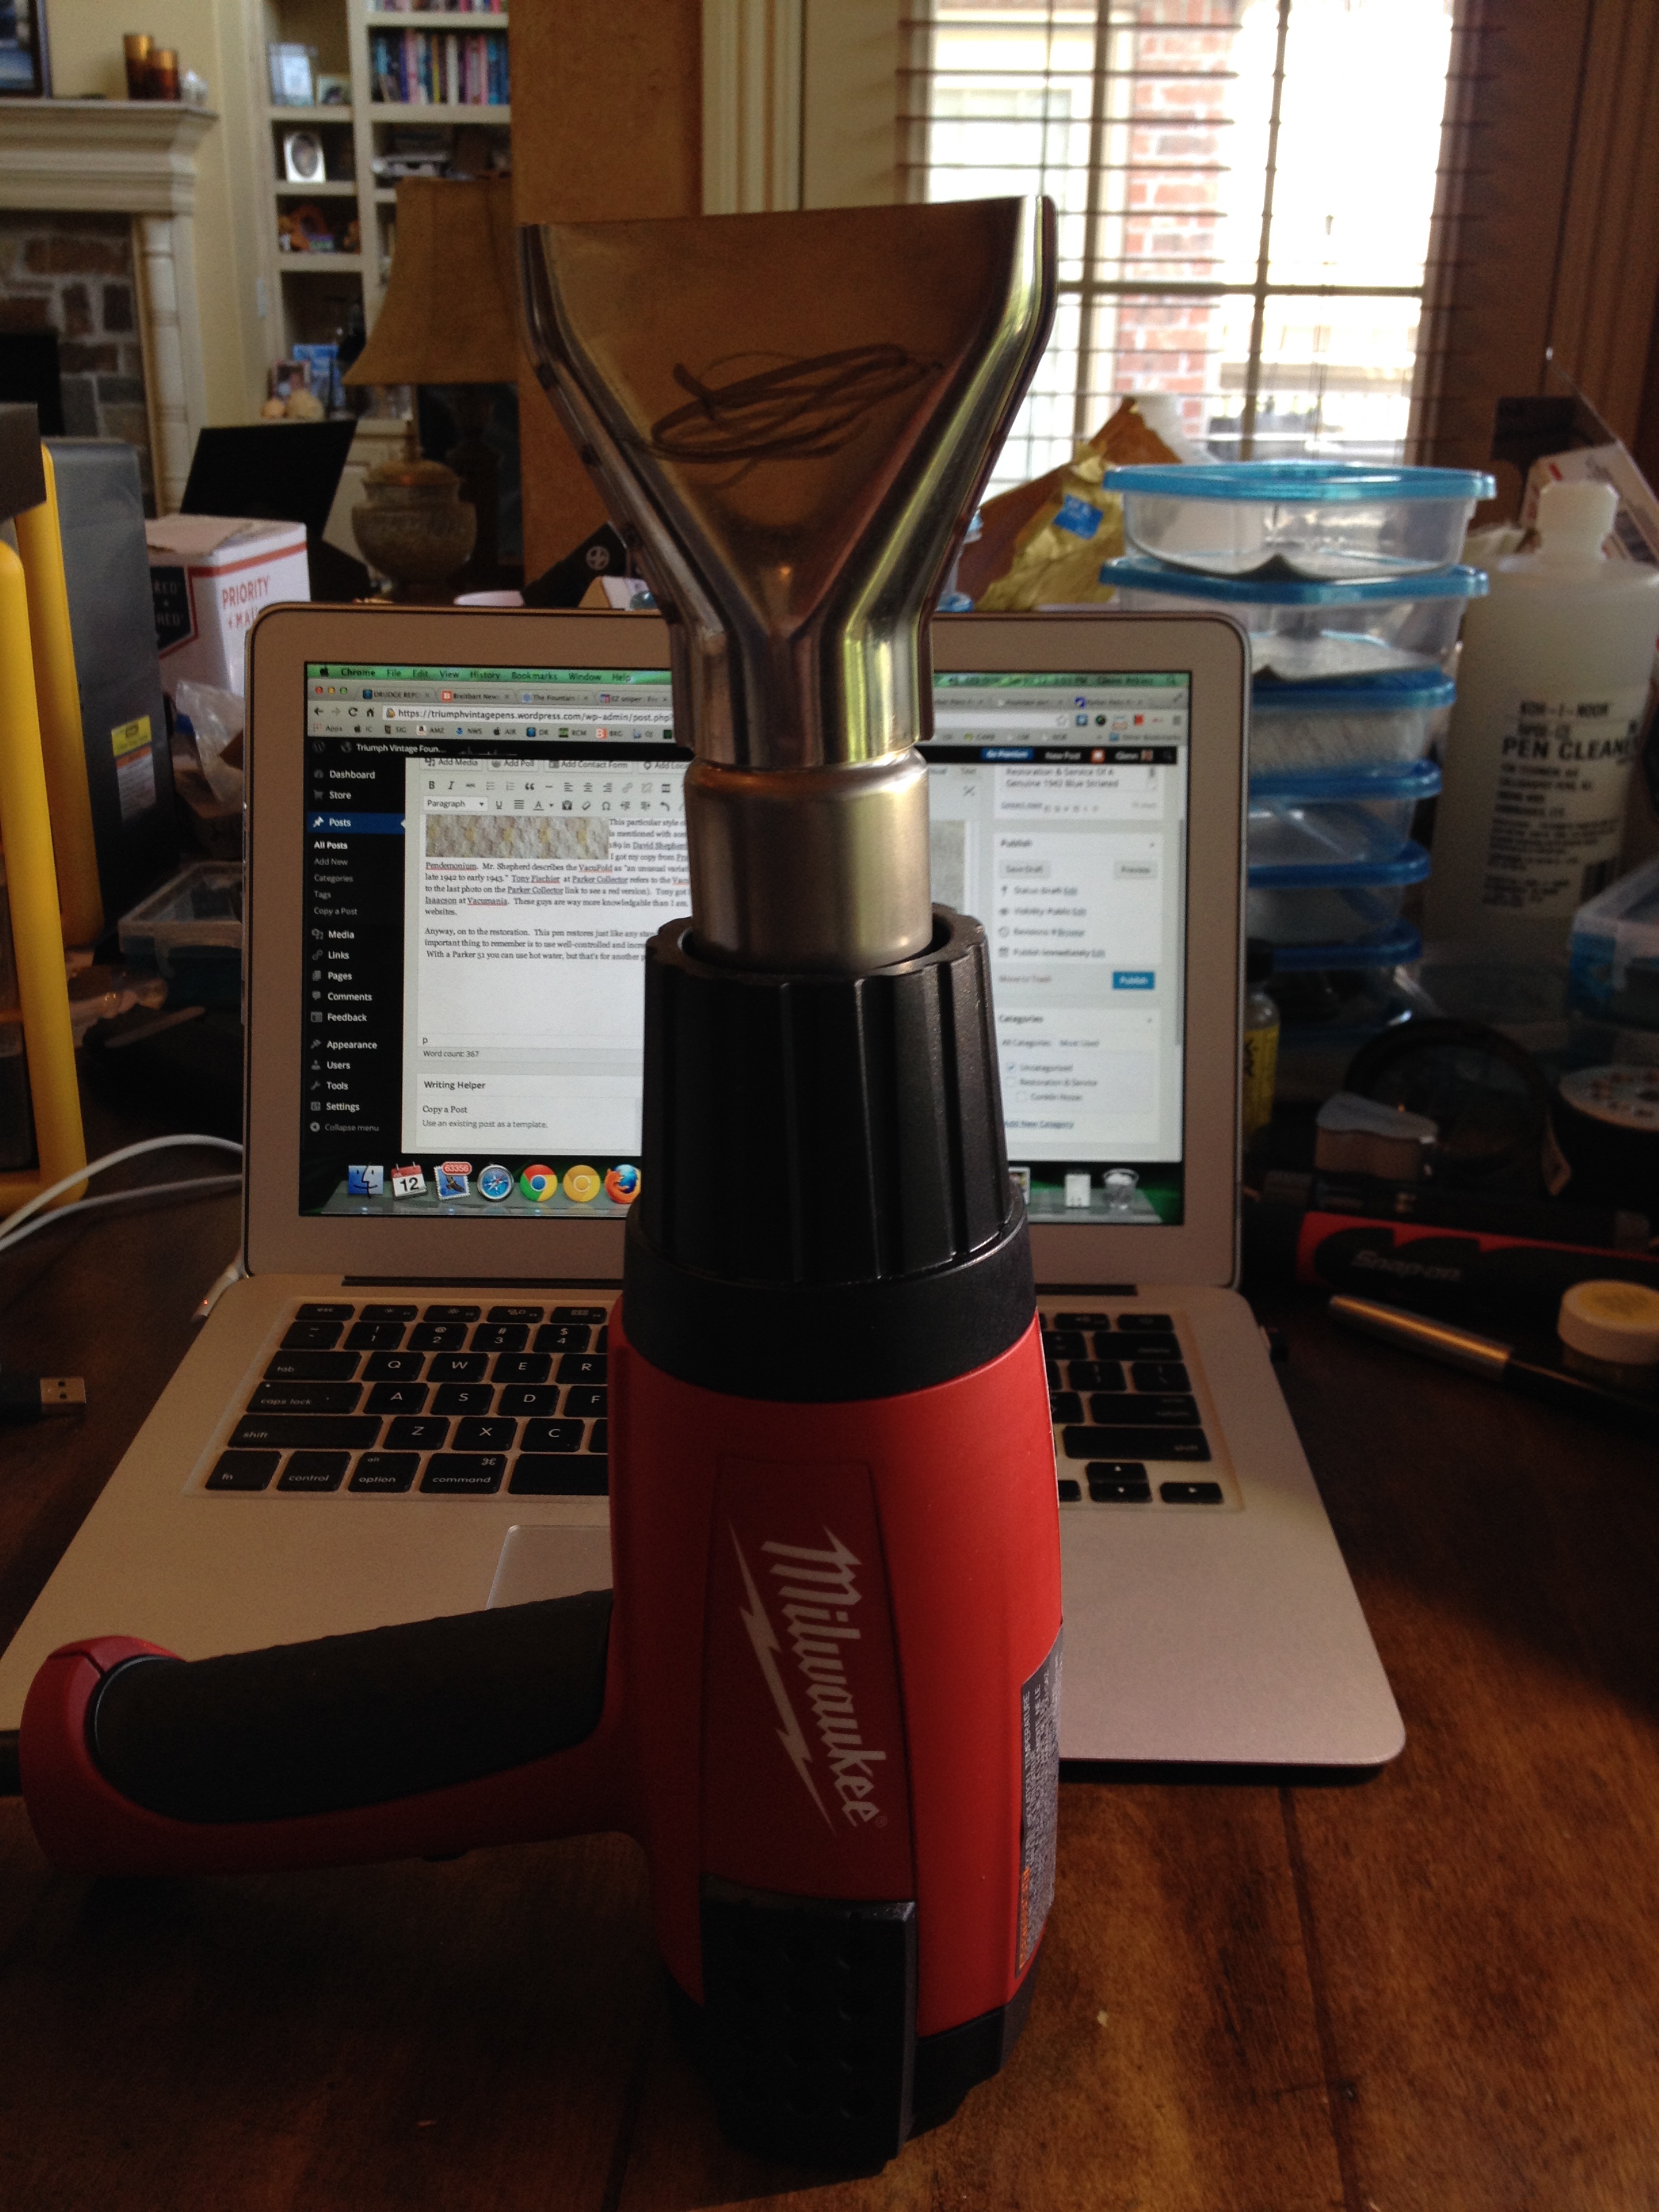 It’s spendy, but it’s much better than the $20.00 model 500F/1500F ones you can find at most hobby stores. The great thing about it is that you can control it in 10F increments from 90F to 1,150F. I use a digital thermometer to measure the actual temperature at the barrel for a given setting on the gun.
The first thing I do is remove the section with the nib and feed still installed using section pliers and dry-heat. If possible, it’s important to leave the nib and feed in when removing the section to provide support to the section. The section should have been installed in the barrel originally with thread sealant, not shellac. The two are similar, but thread sealant releases at a lower temperature than shellac and the section should remove relatively easily. However, if the pen’s been around the block a few times, there’s no telling what was used to seal the section to the barrel. Thread sealant, shellac, super glue, epoxy, nothing? Ouch! I’ve had a prominent Ebay seller tell me that they don’t use anything, which means nothing! Really? Okay? We’ll use the proper thread sealant.
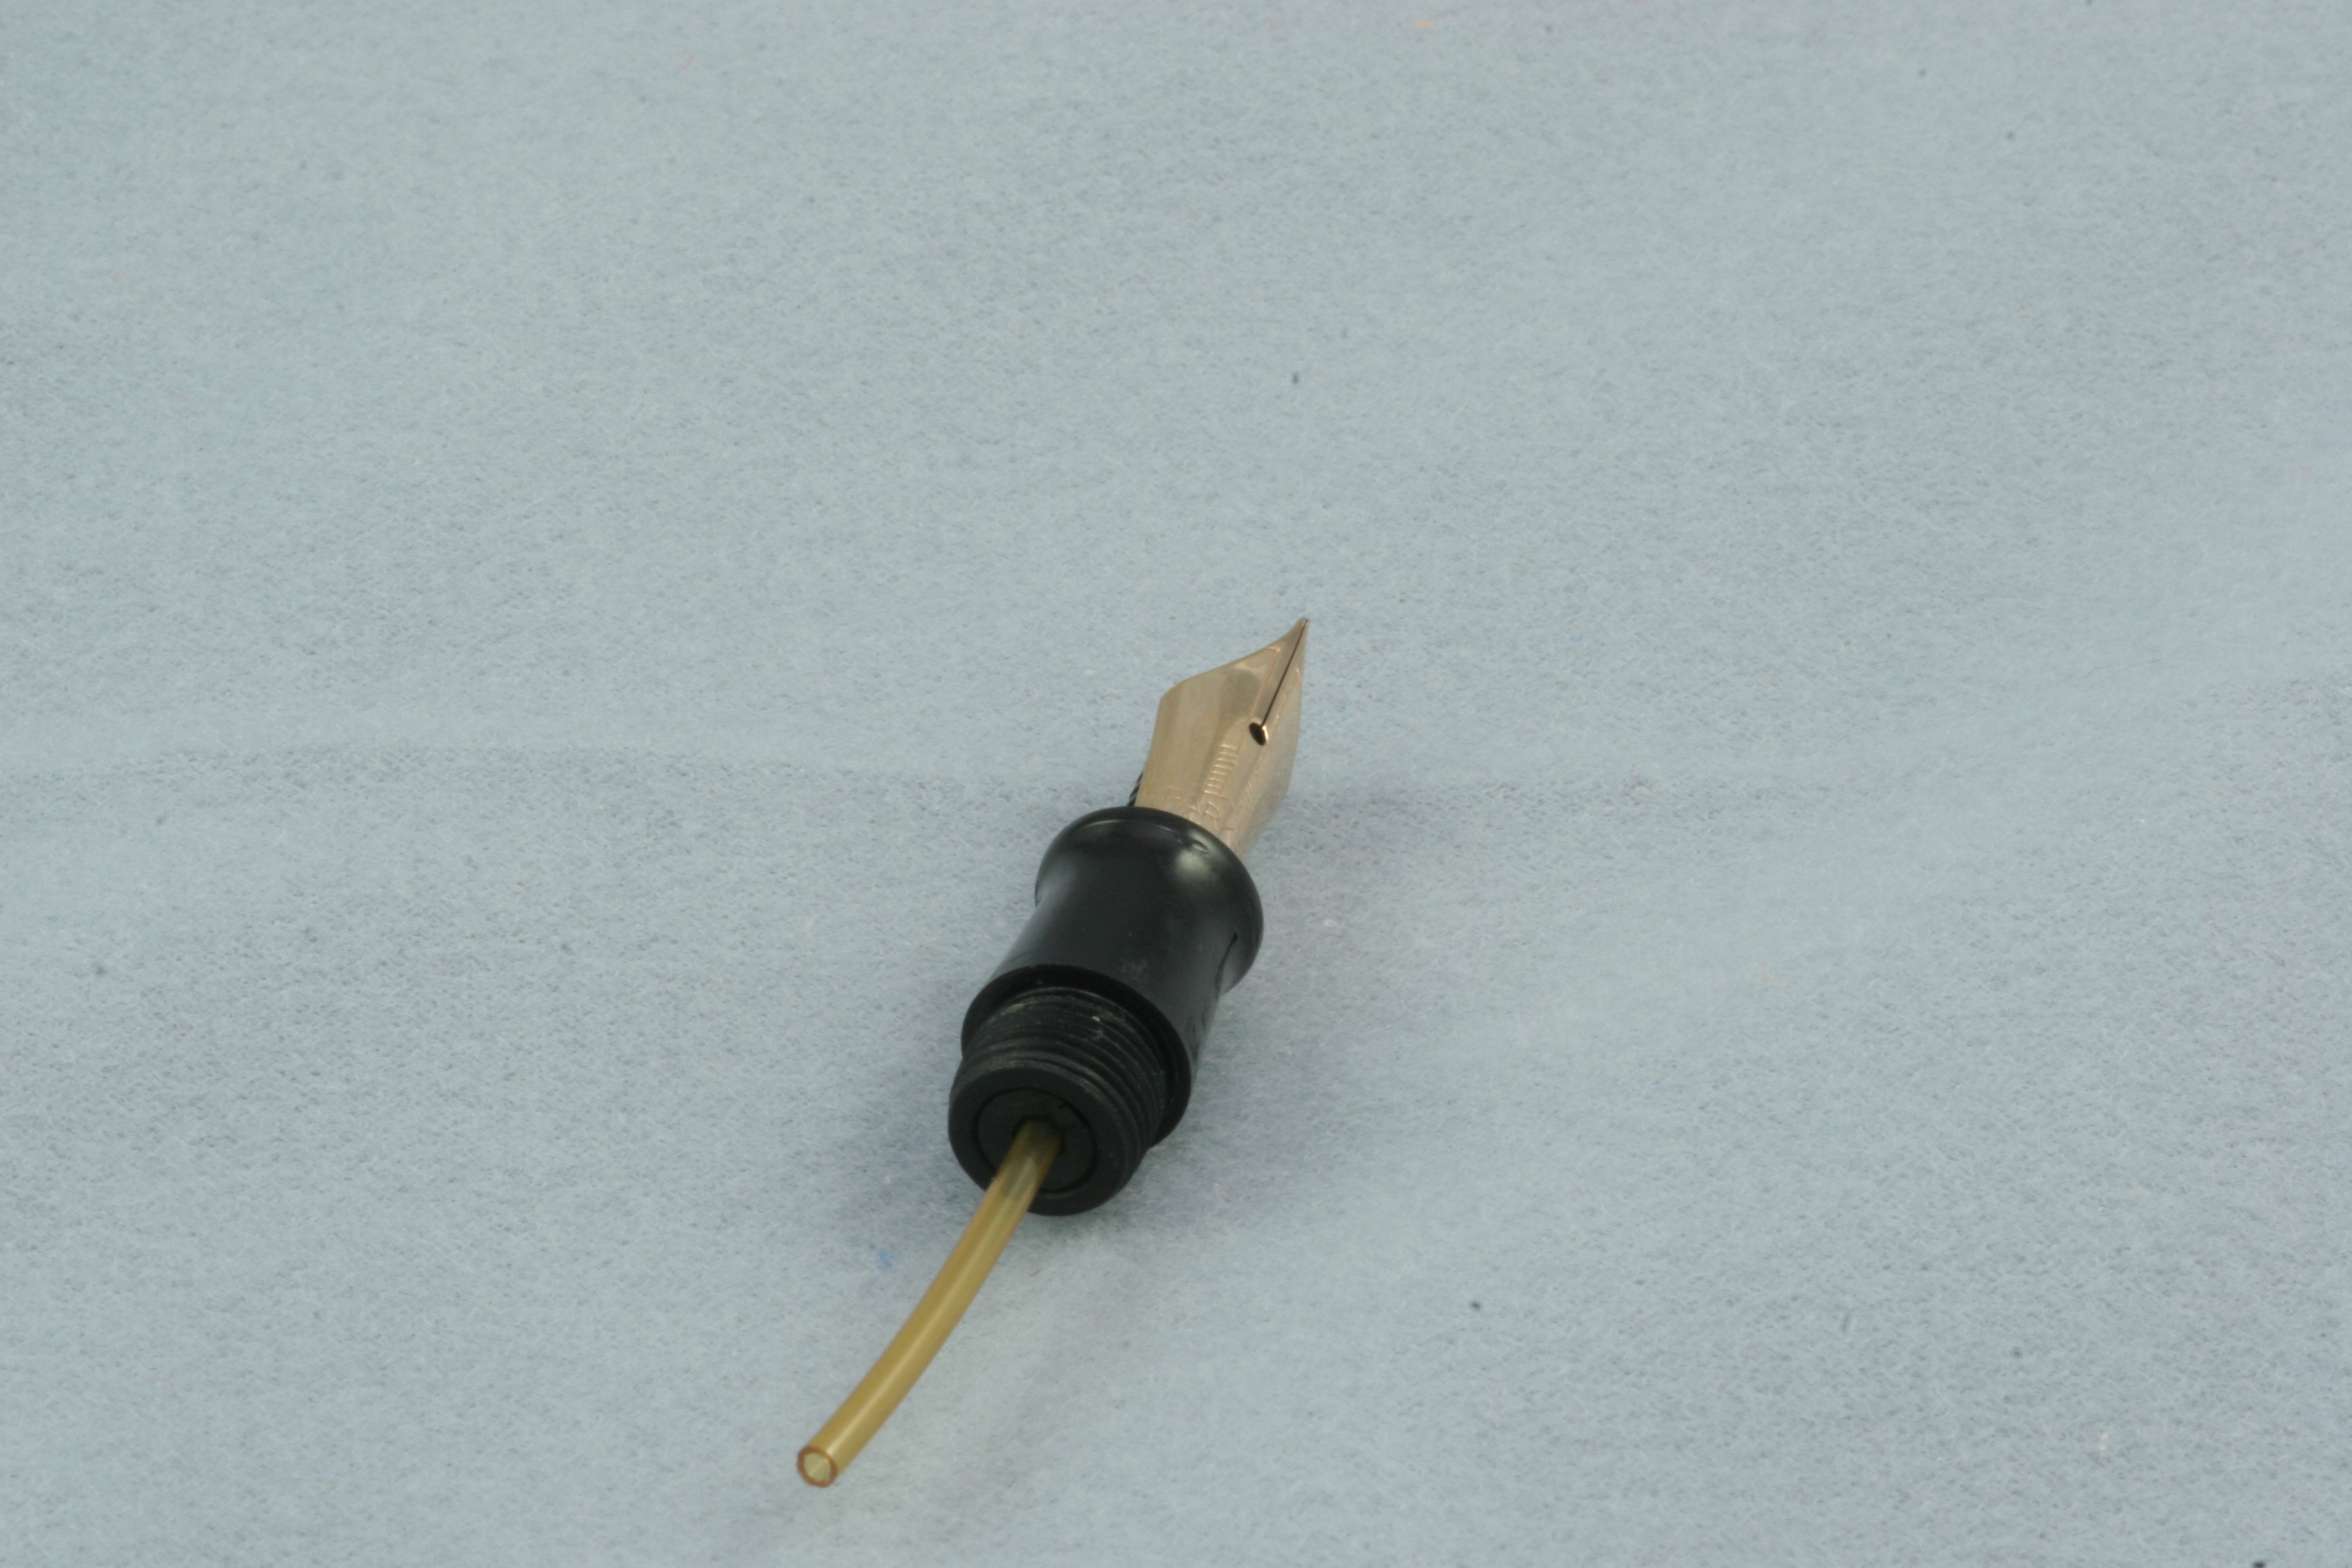 Here’s the section, nib, feed, and breather tube after it has been removed from the pen using a pin and knockout block, cleaned in an ultrasonic cleaner, and reassembled. Note that the feed is set flush with the rear of the section. You can do this by hand, but many times it is a very tight fit. I use a set of parallel nib pliers and some water based diaphragm lubricant to assist after hand inserting the nib and feed as far as it will go. I used a little Simichrome on the nib, followed by a rouge cloth. Perfect!

